Claude Code终端美化优化
本文目录
Claude Code 终端美化优化
说明:部分软件包存在个人偏好。如你明白其作用和意义,按需选择;如不明白,请悉数按序执行安装。目的是正确、方便、快乐地使用。
Windows 安装
准备工作
从魔法软件中获得其提供的 Proxy 端口,在 PowerShell 中执行以下命令后被魔法软件正确代理,以保证诸多软件包的安装拉取正常进行:
注:将
Port修改为你实际的代理端口
$env:HTTP_PROXY="http://127.0.0.1:Port"; $env:HTTPS_PROXY="http://127.0.0.1:Port"Windows 环境安装
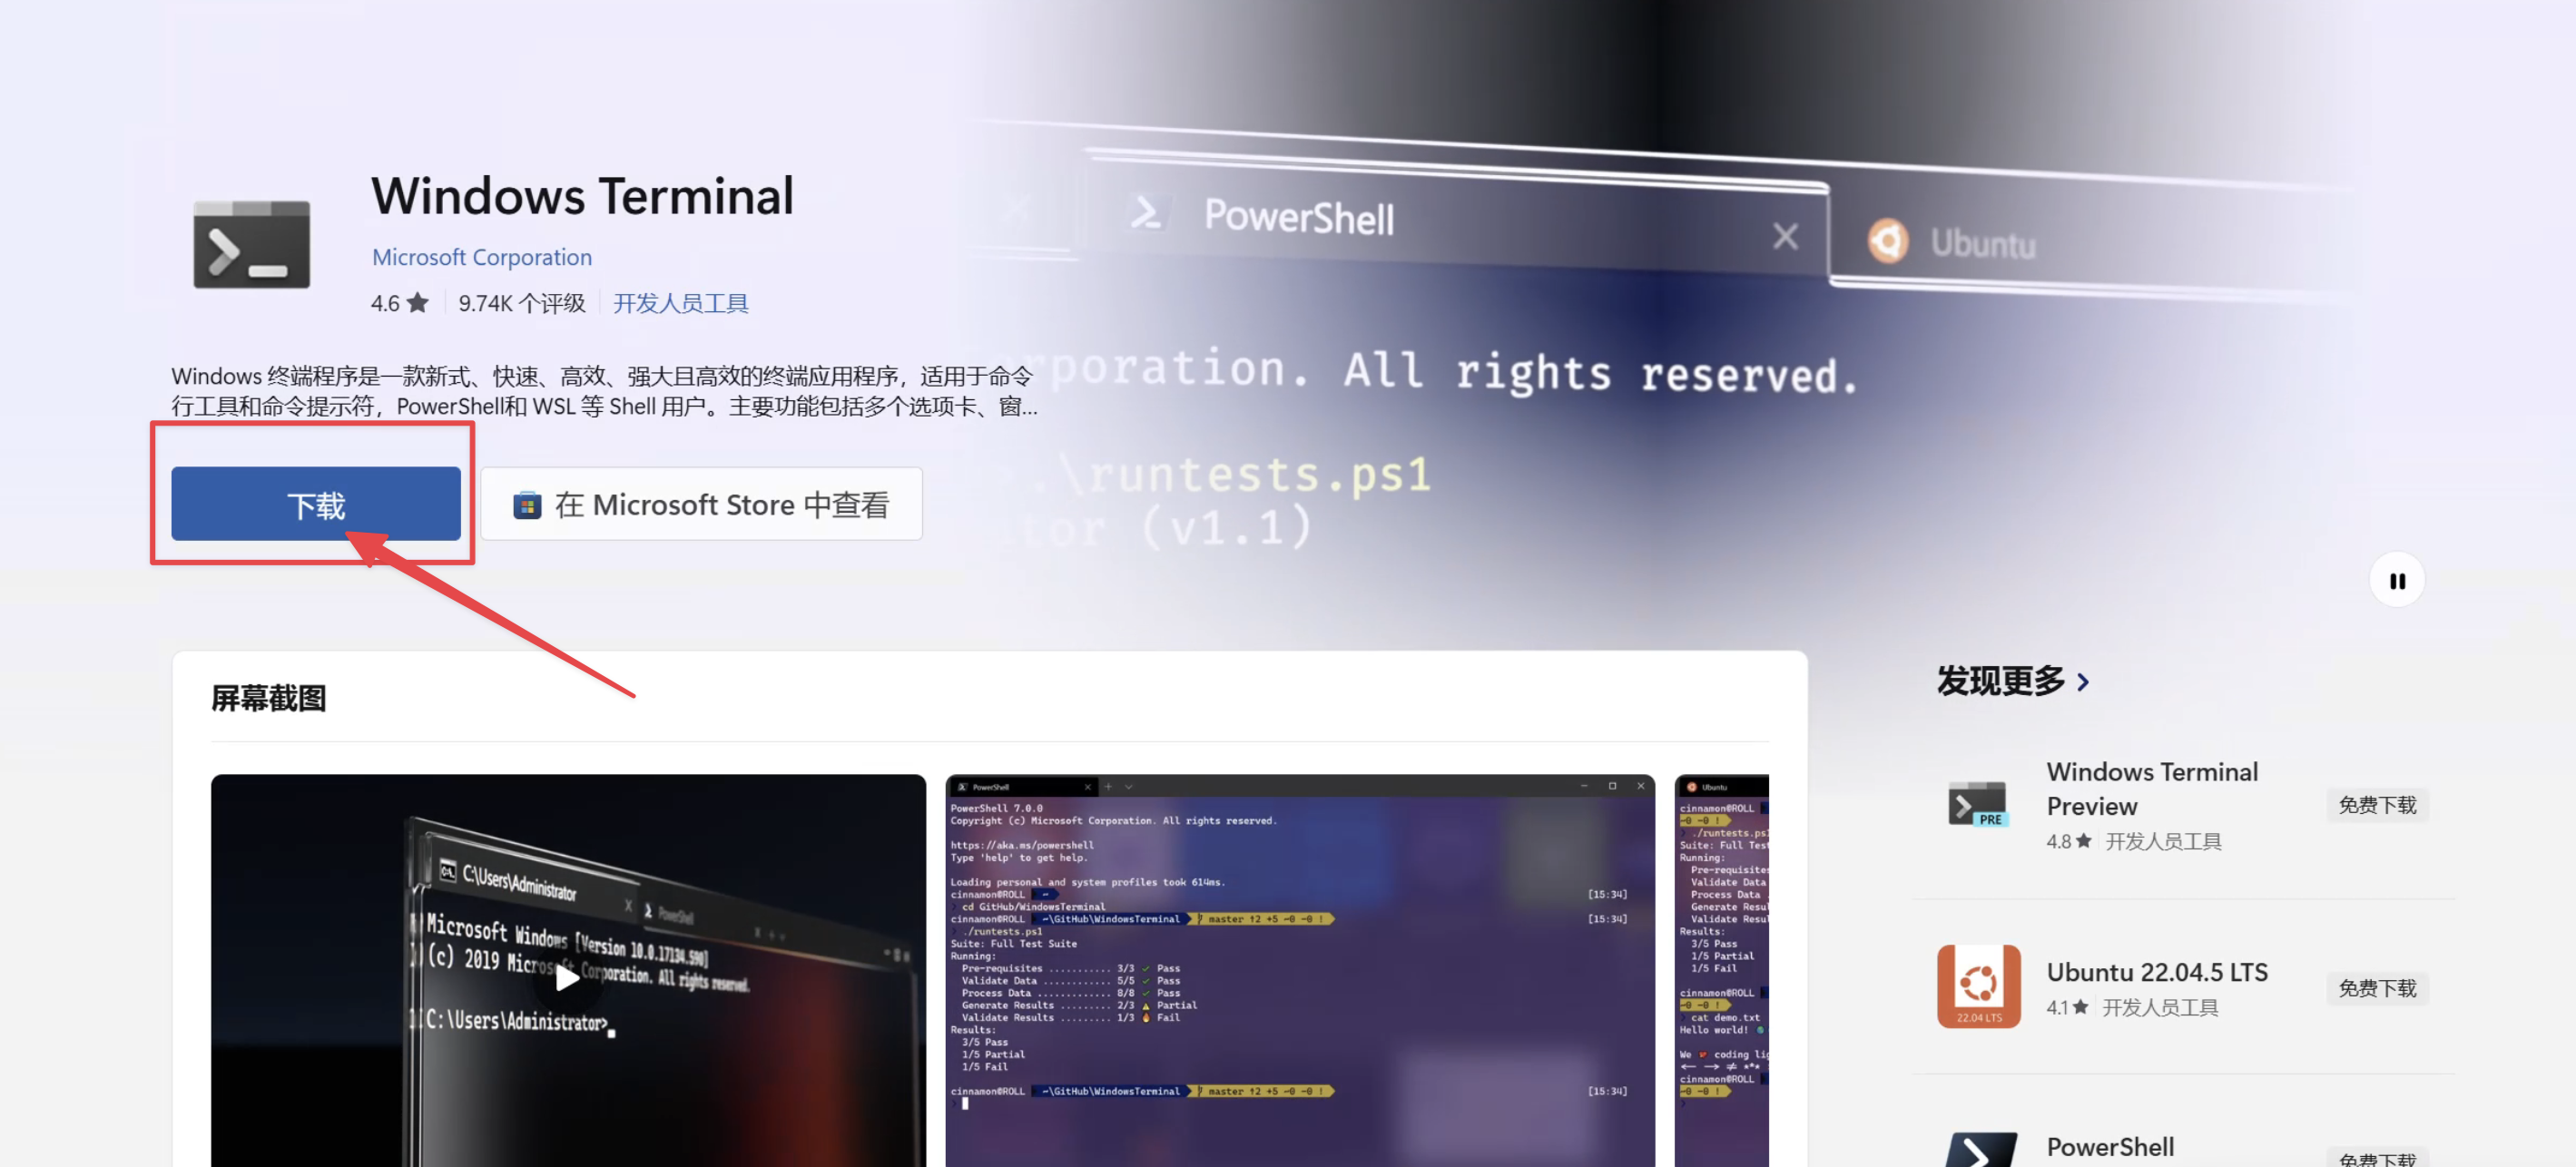
1. Windows Terminal
下载地址:Windows Terminal
下载程序,完成安装:
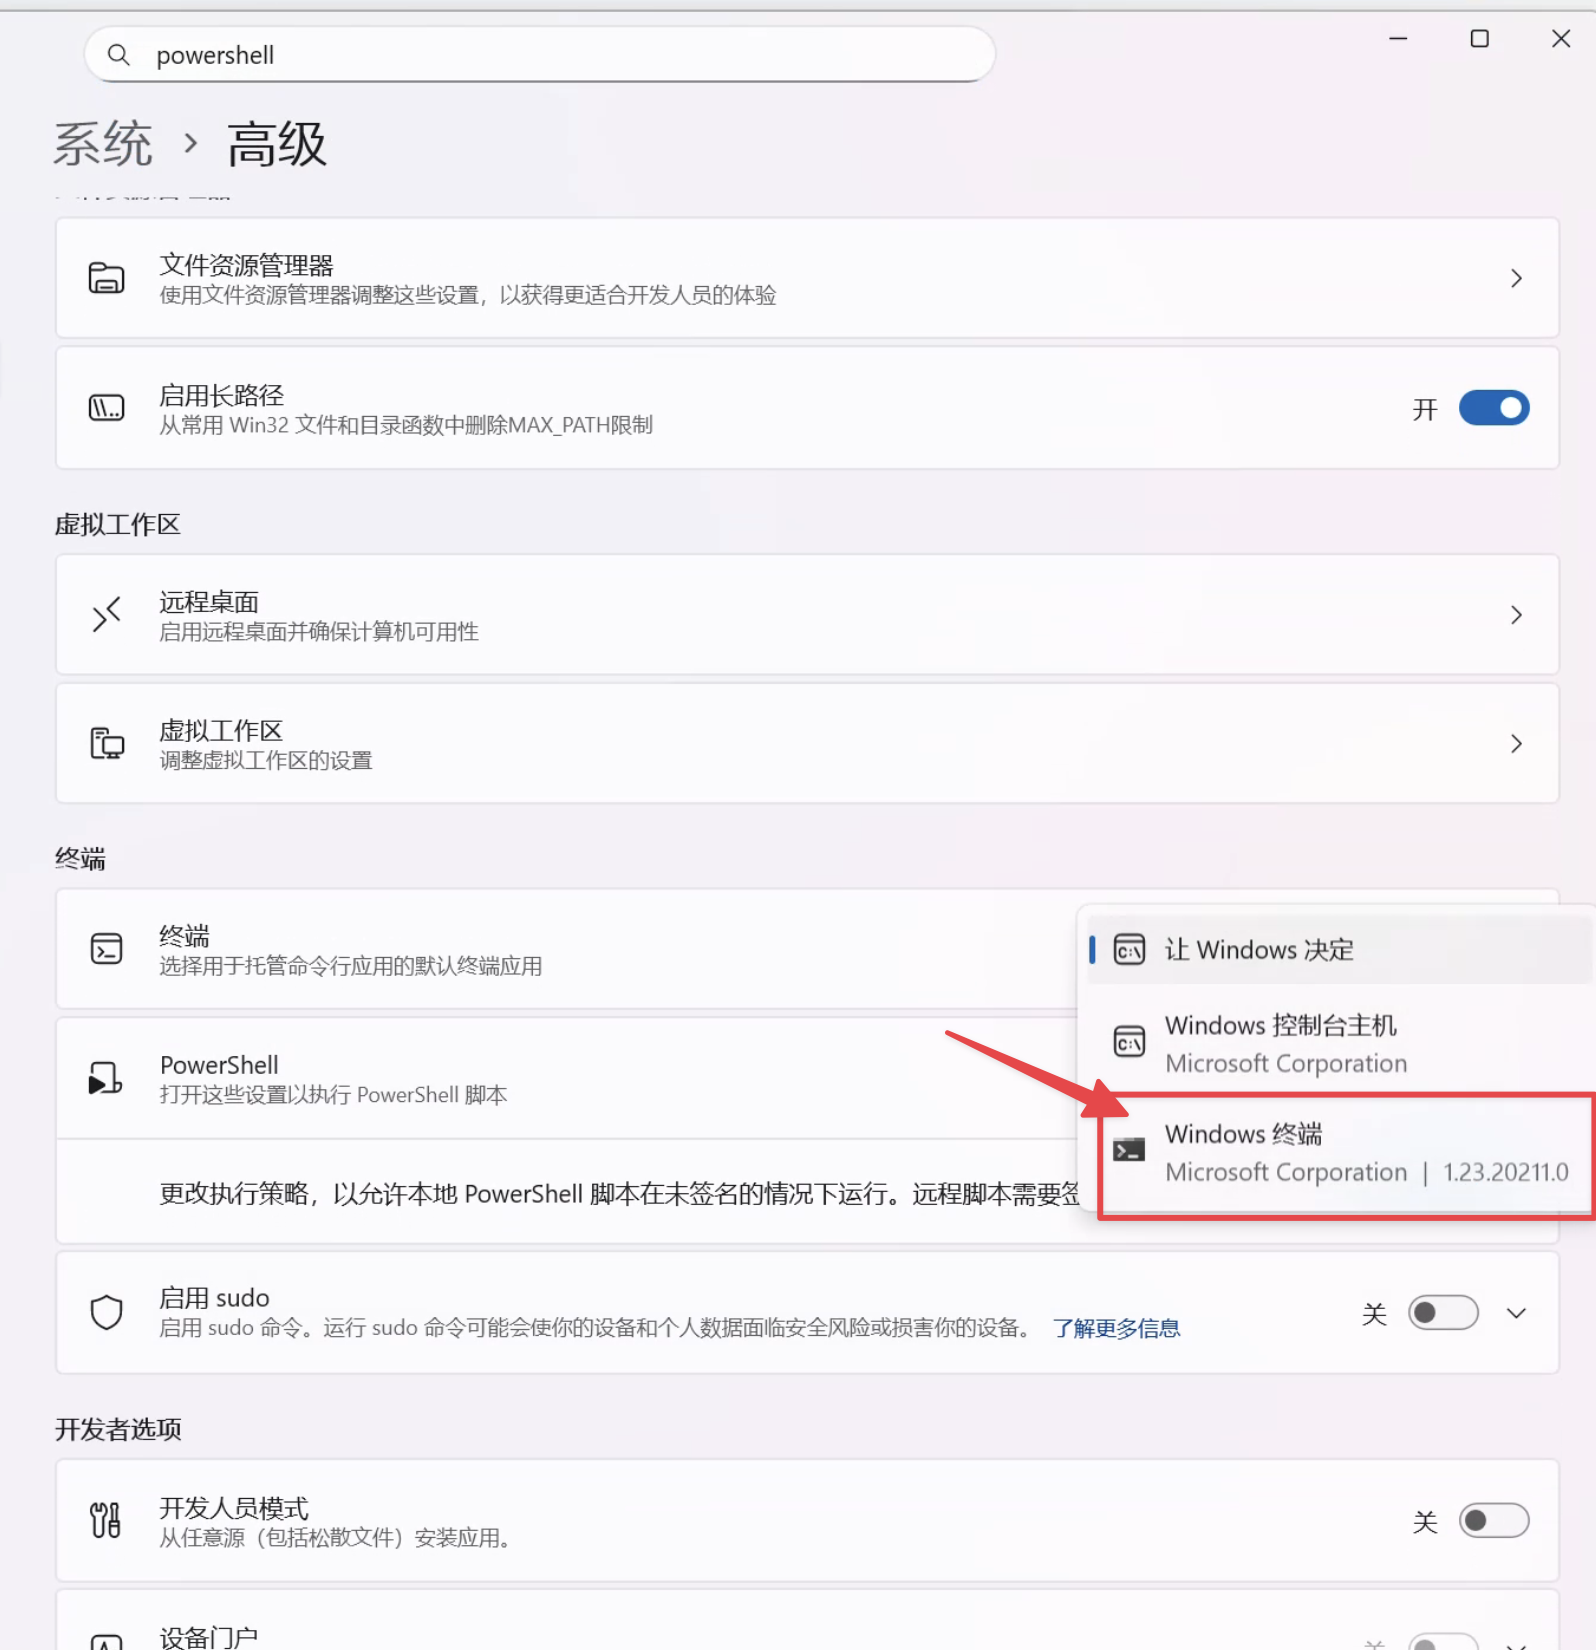
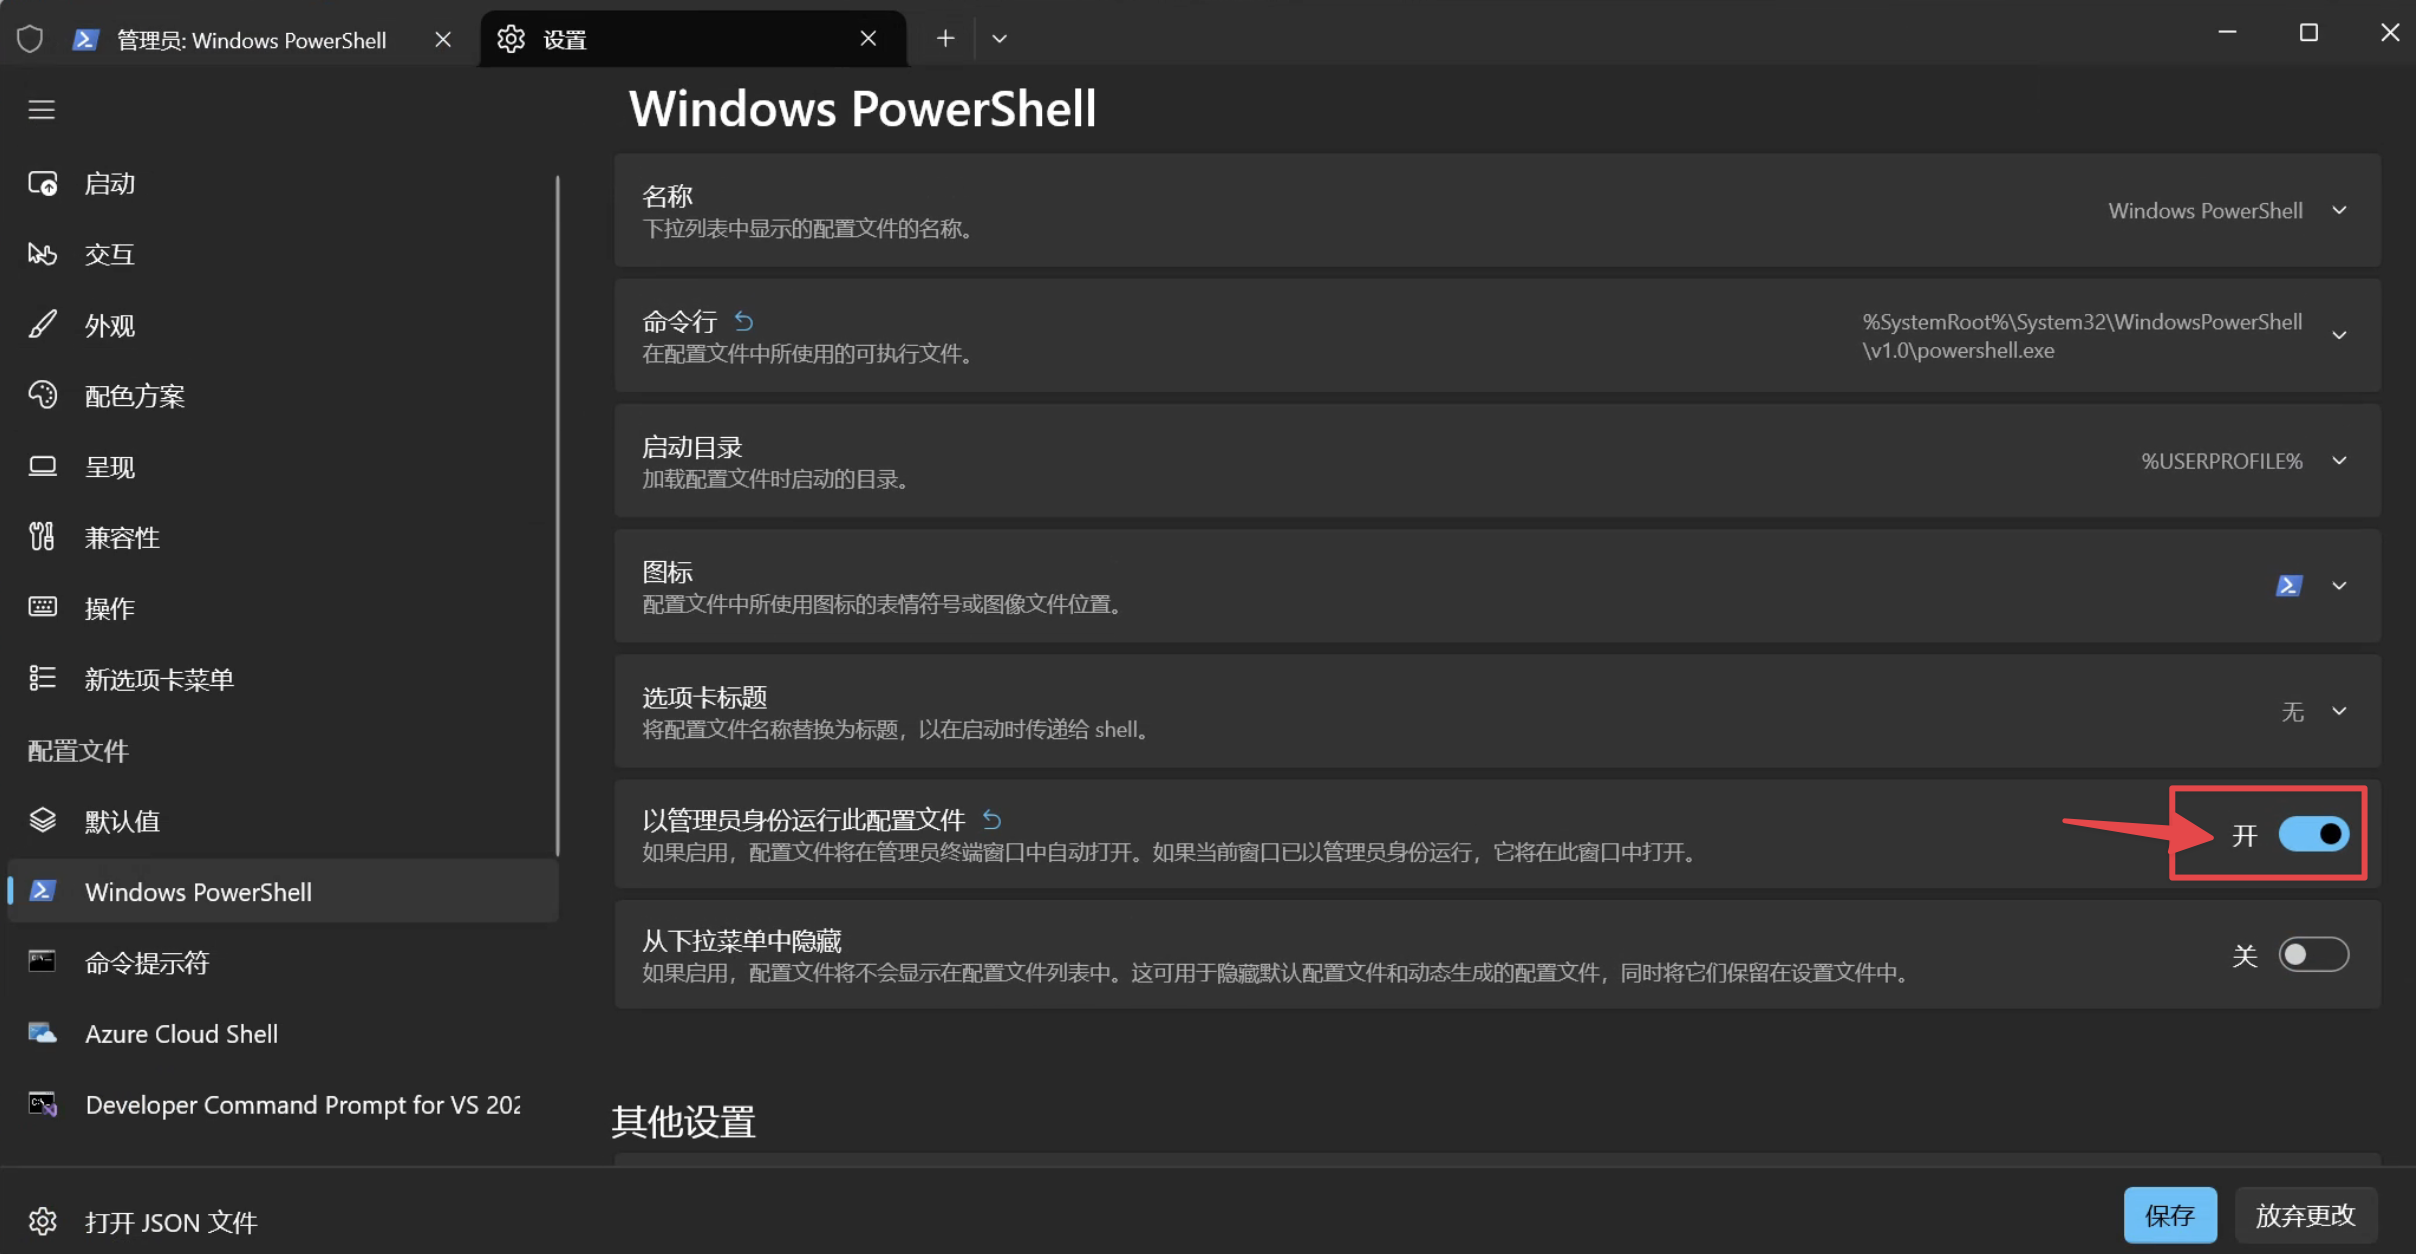
安装好后,设定默认打开系统内置 PowerShell 并且给予默认管理员权限:
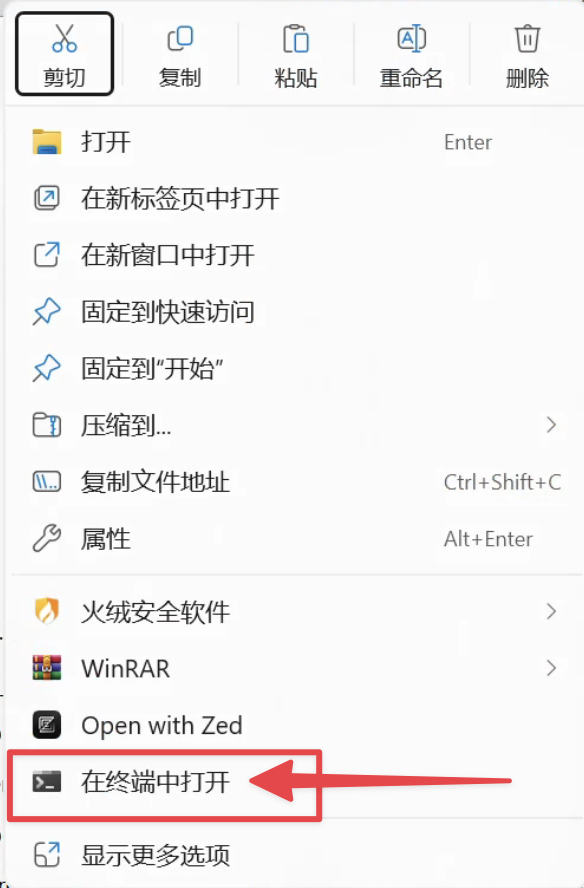
后续右键能够直接在所处文件夹内打开对应的终端 Shell:
2. WinGet
$progressPreference = 'silentlyContinue'
Install-PackageProvider -Name NuGet -Force | Out-Null
Install-Module -Name Microsoft.WinGet.Client -Force -Repository PSGallery | Out-Null
Write-Host "Using Repair-WinGetPackageManager cmdlet to bootstrap WinGet..."
Repair-WinGetPackageManager -AllUsers
3. PowerShell 7
winget install Microsoft.PowerShell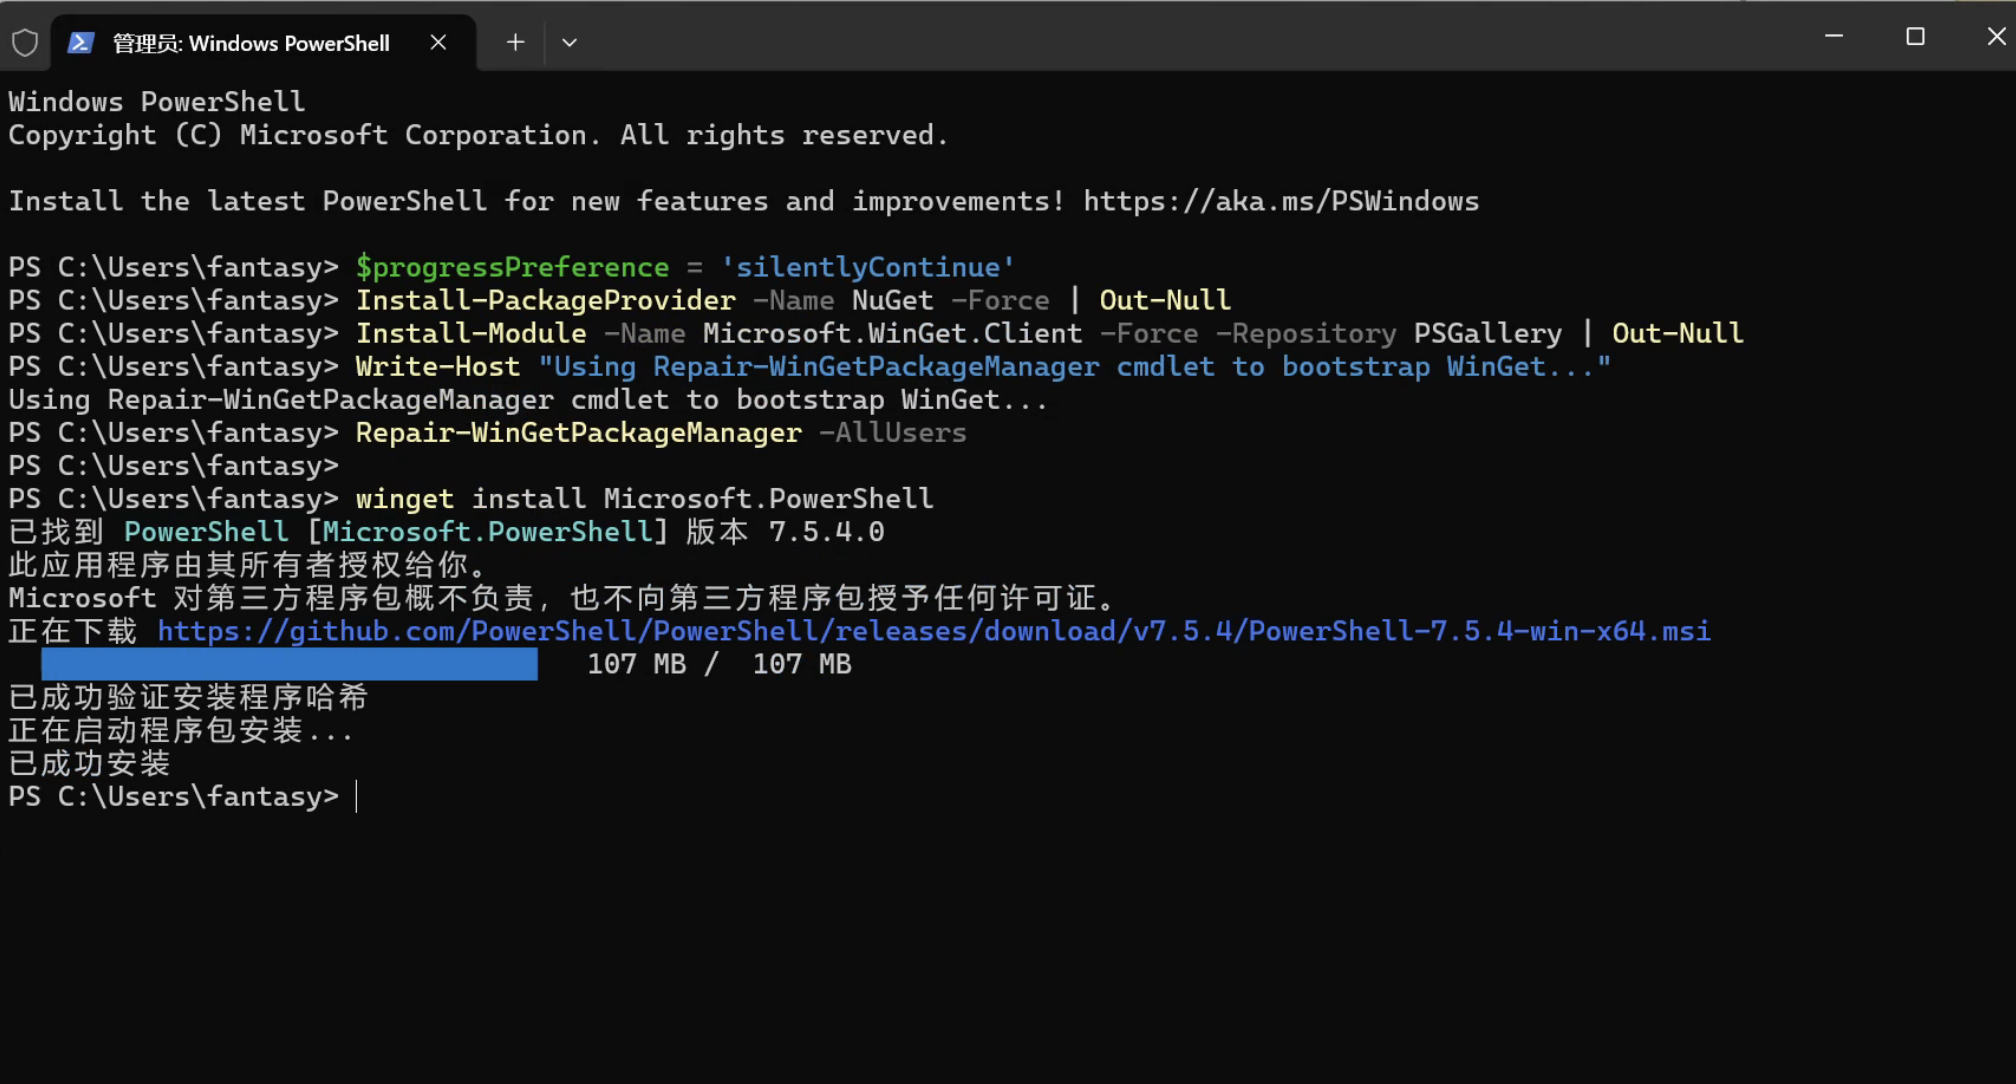
切换默认为我们刚安装的 PowerShell:
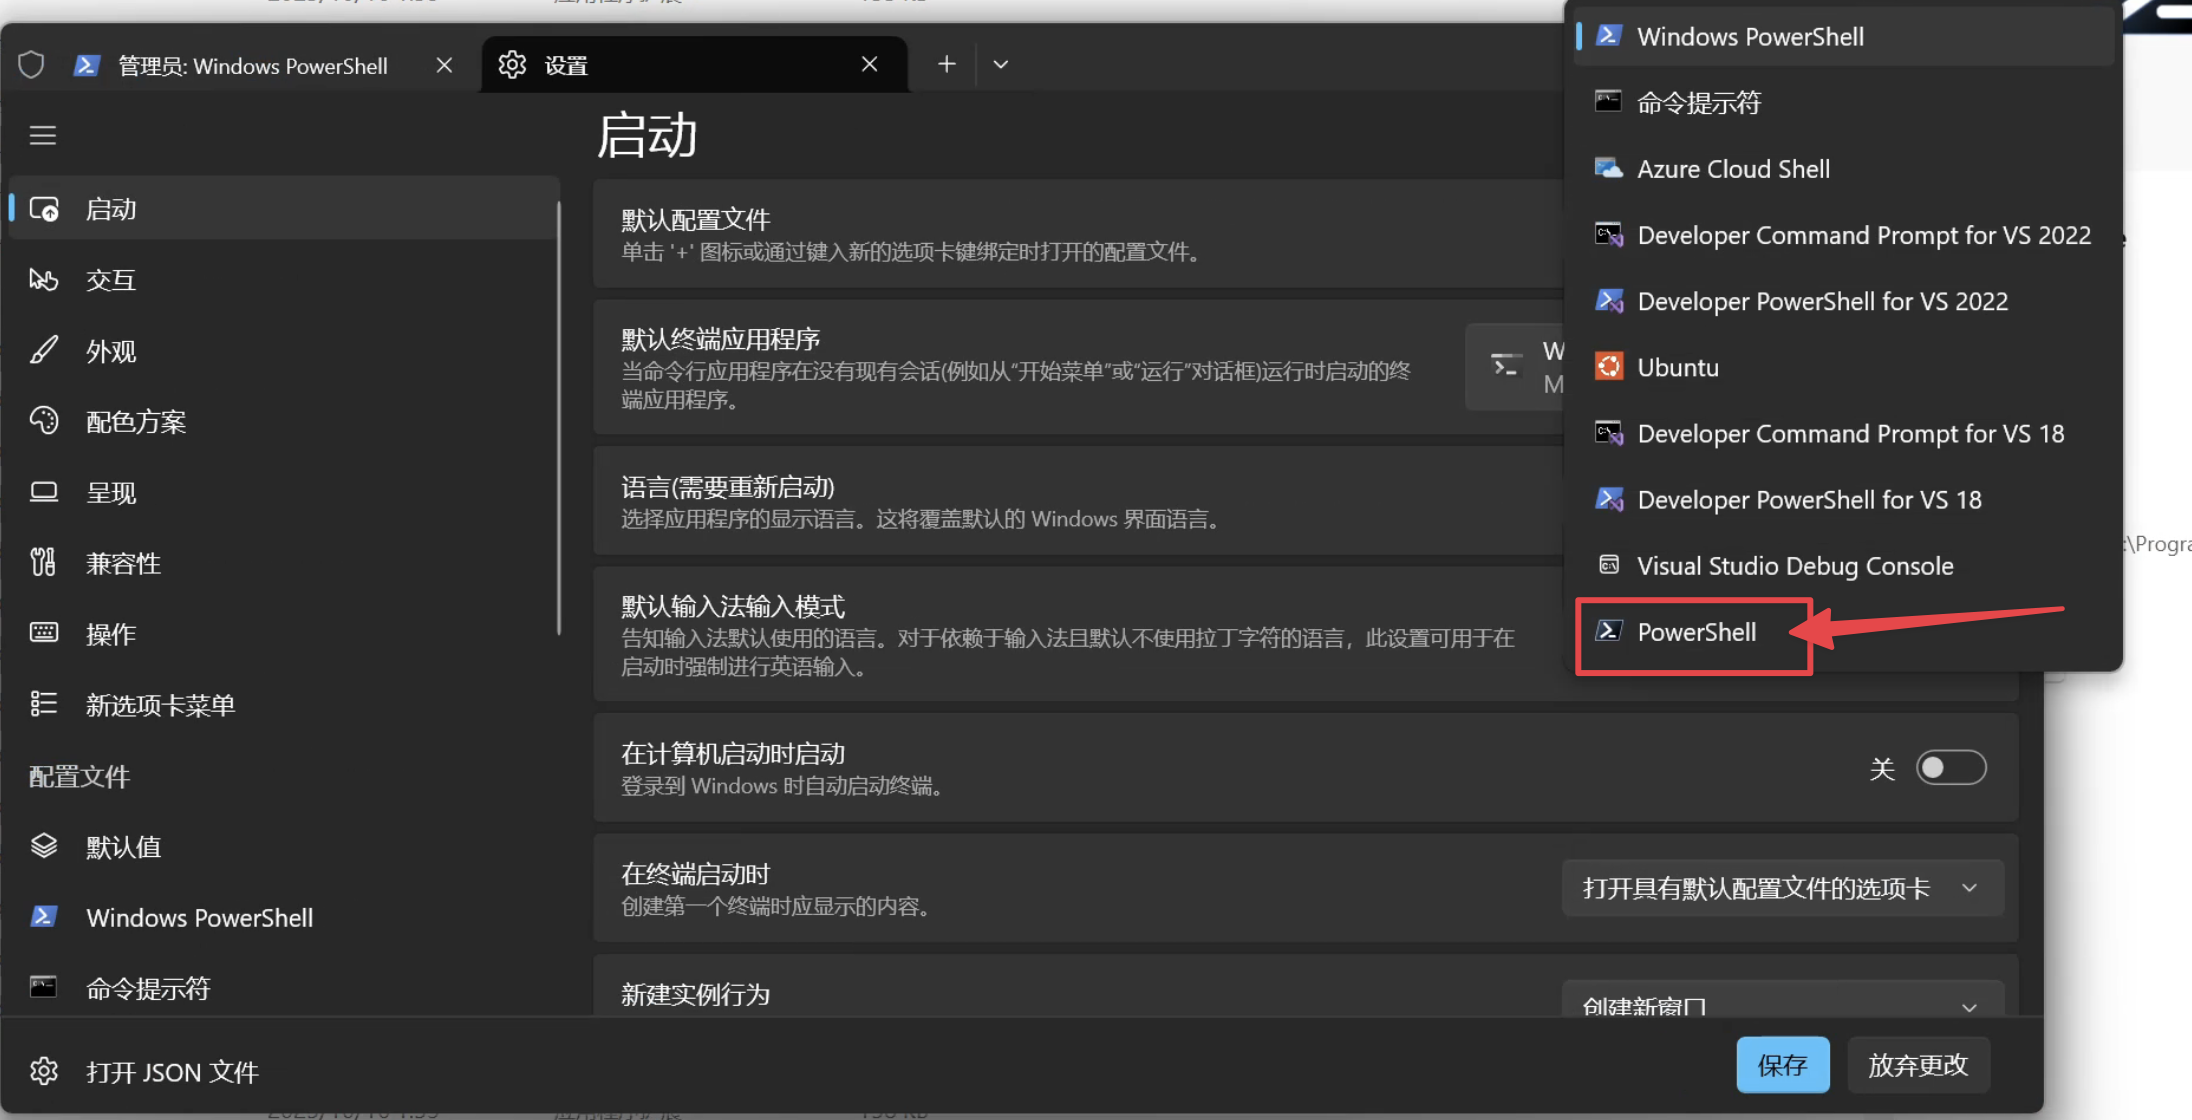
同样修改其默认配置为管理员启动。
重要:全部关闭后打开新终端窗口,继续安装其他内容。
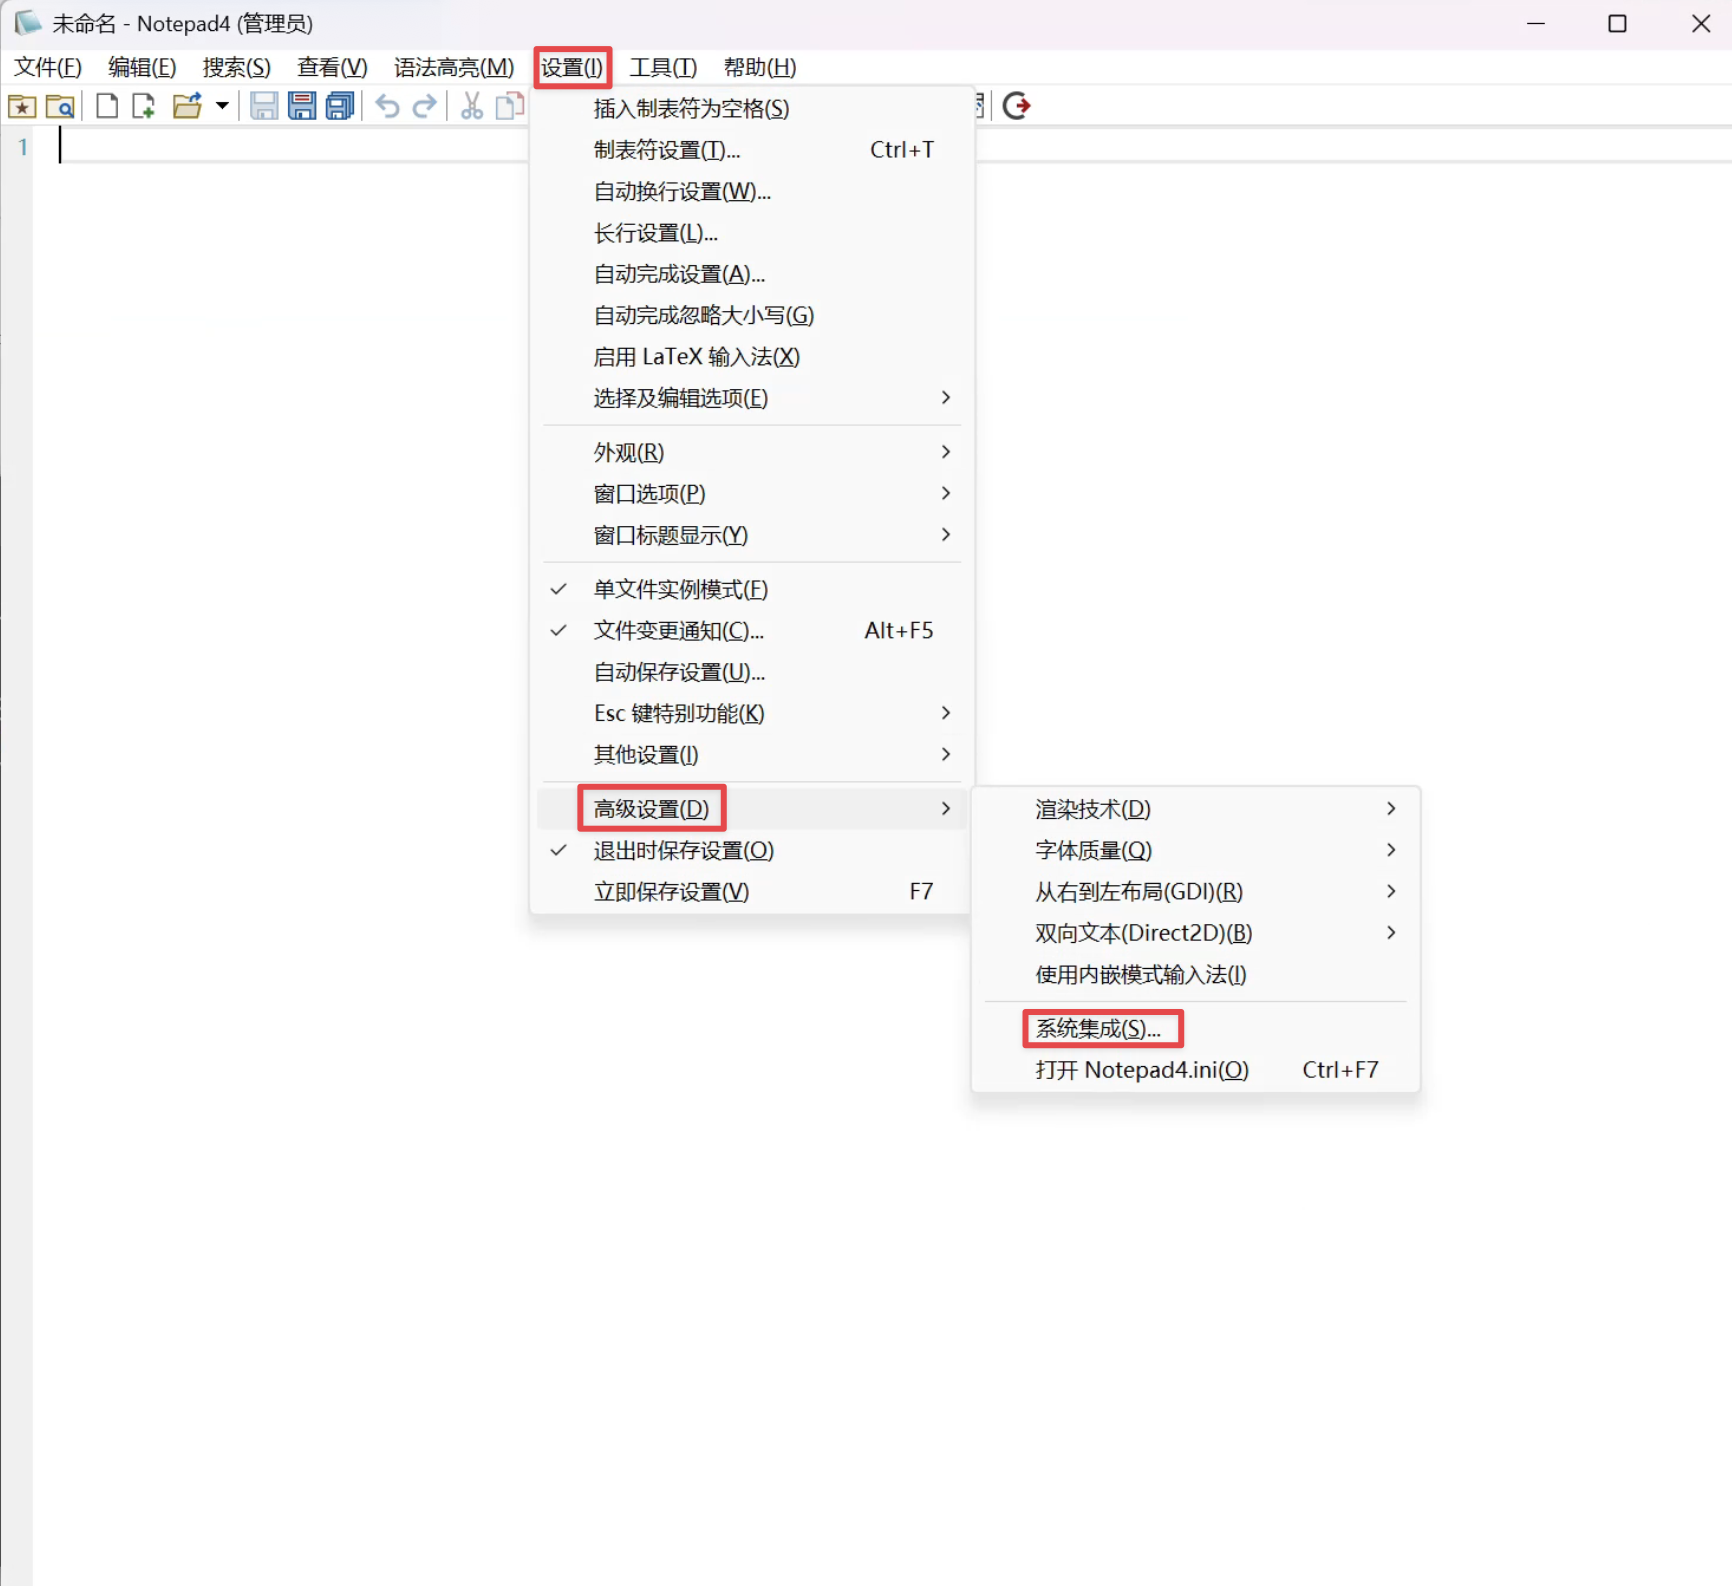
4. Notepad4
winget install zufuliu.notepad4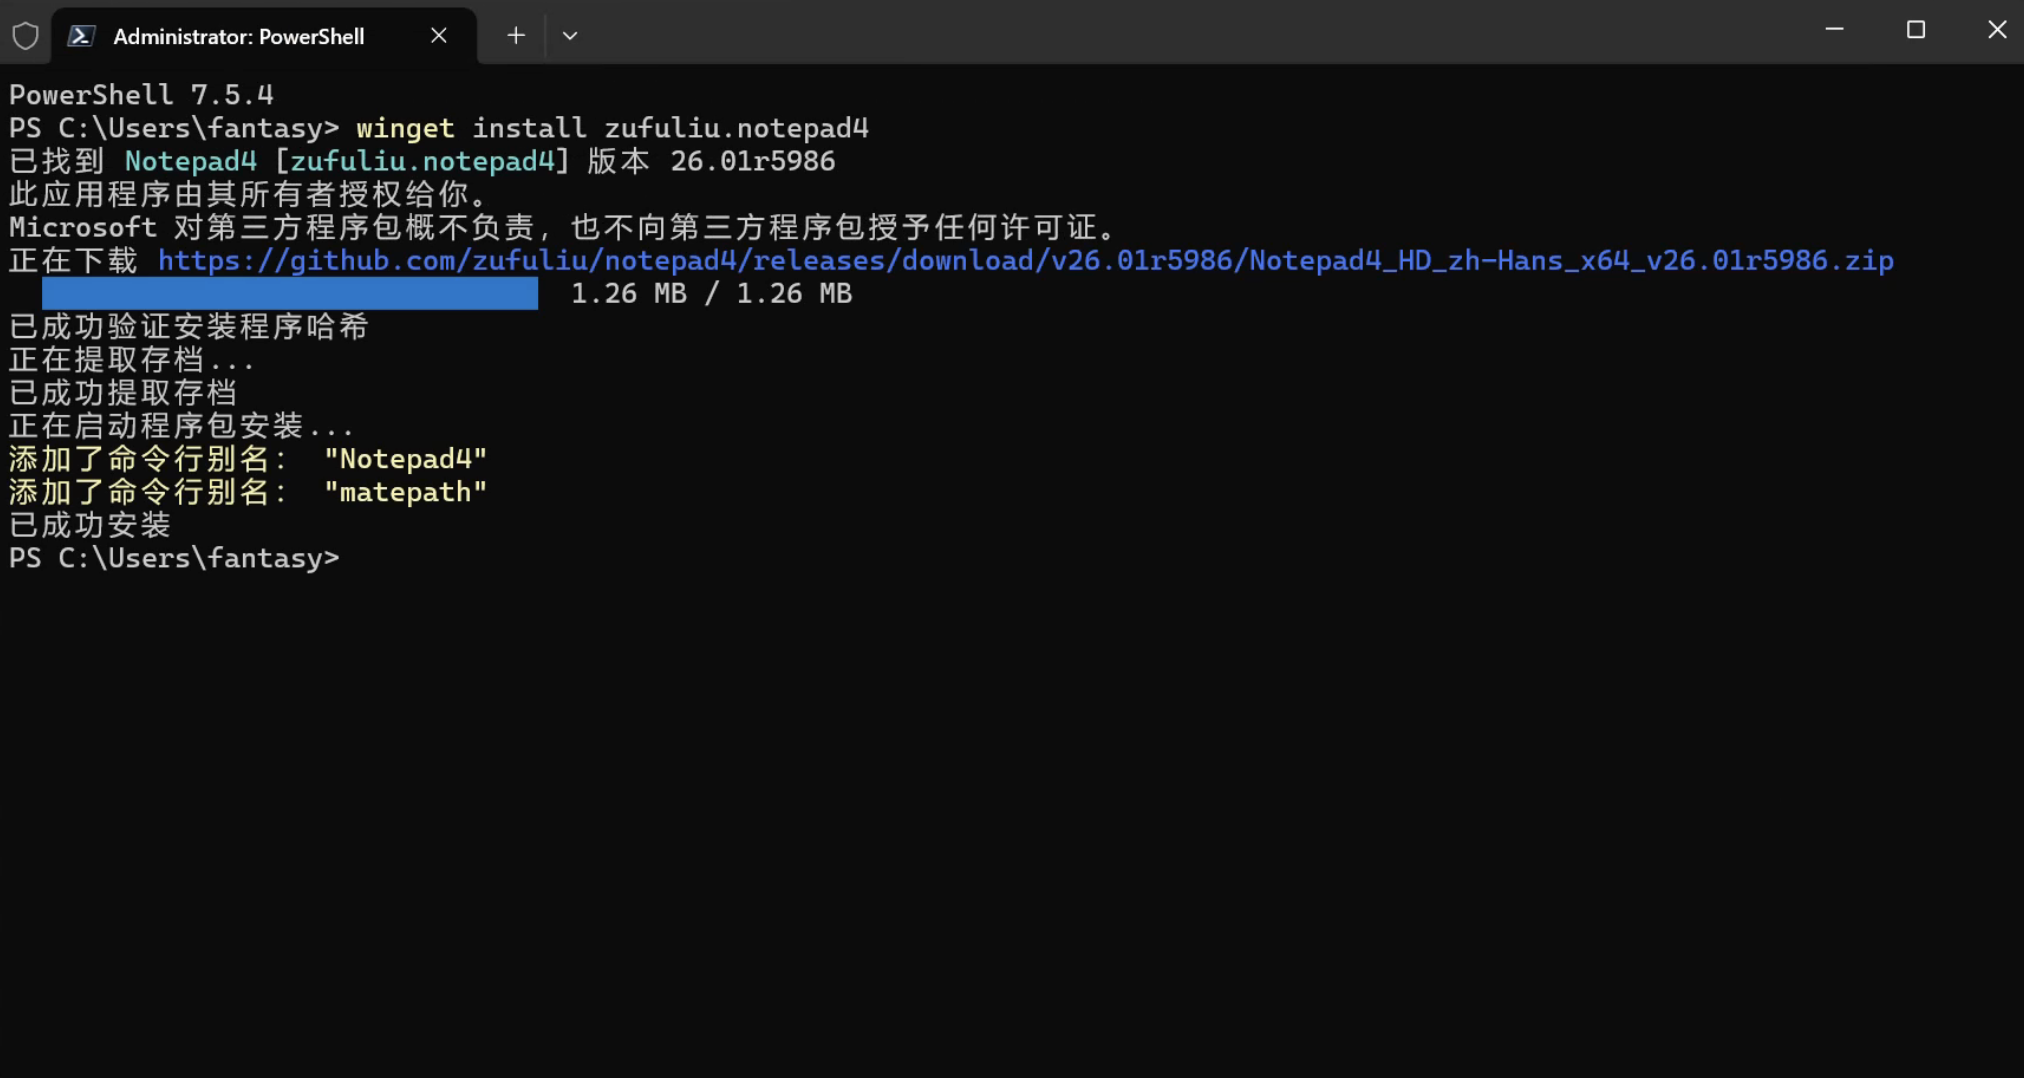
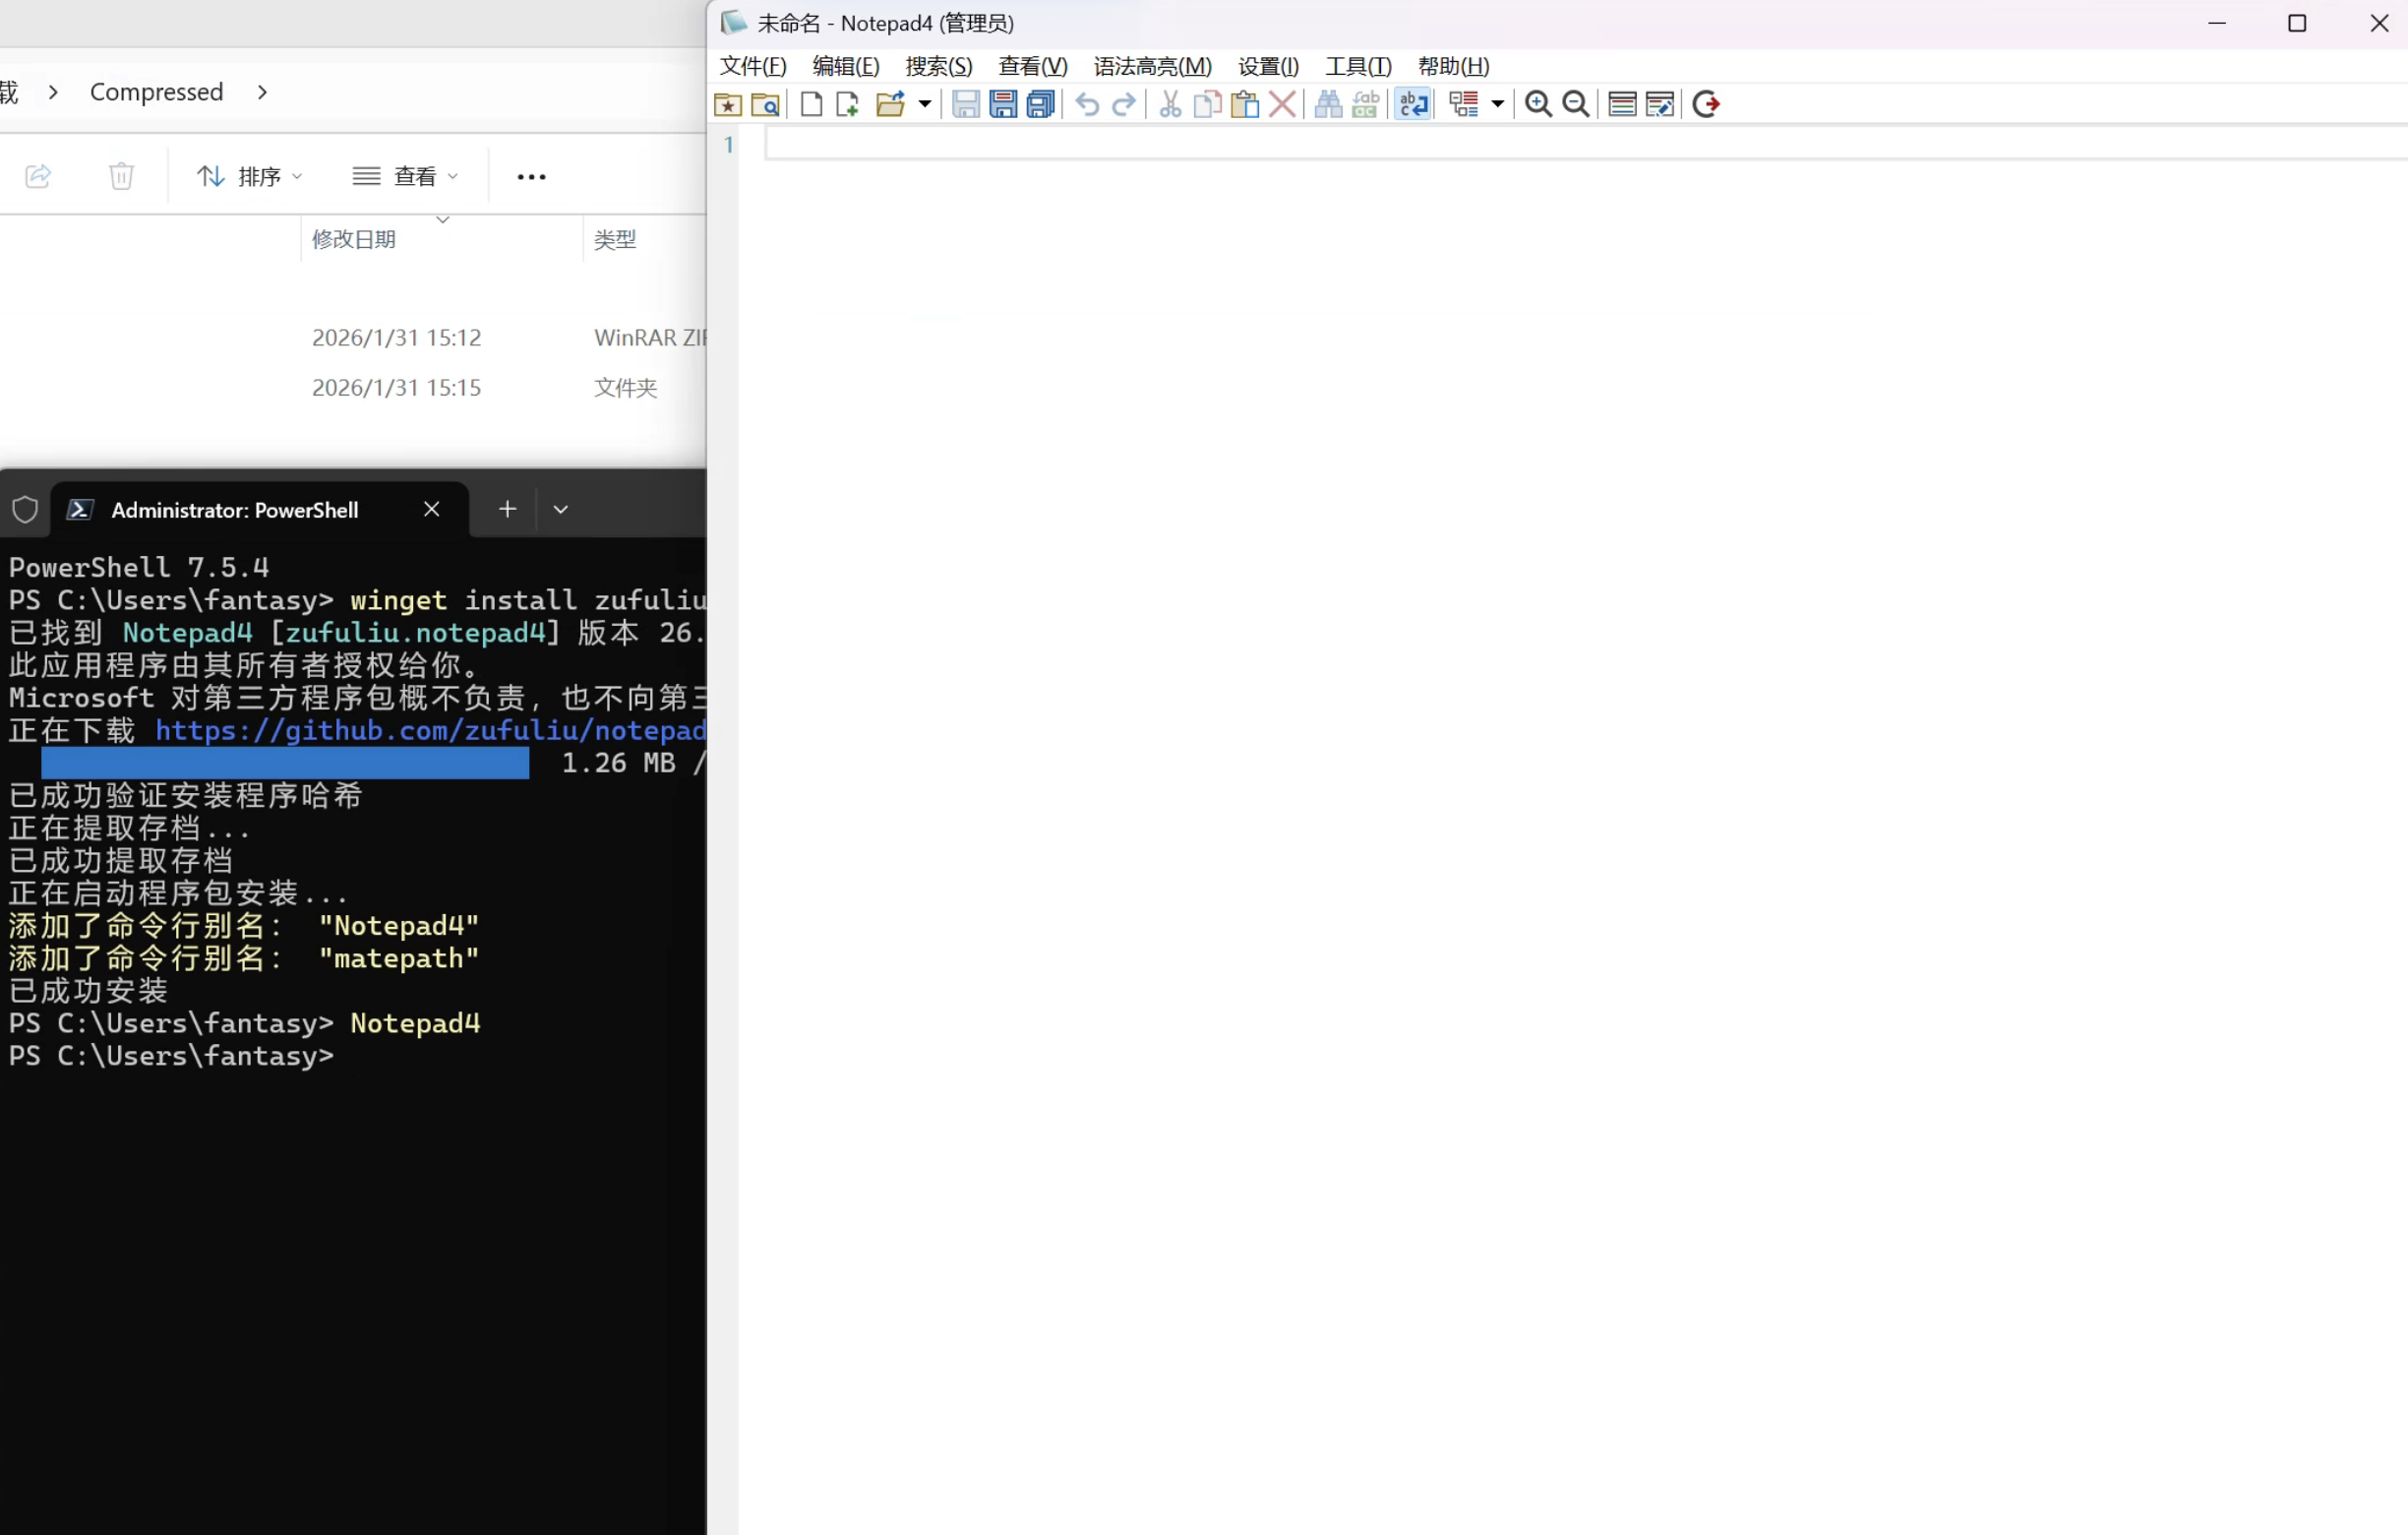
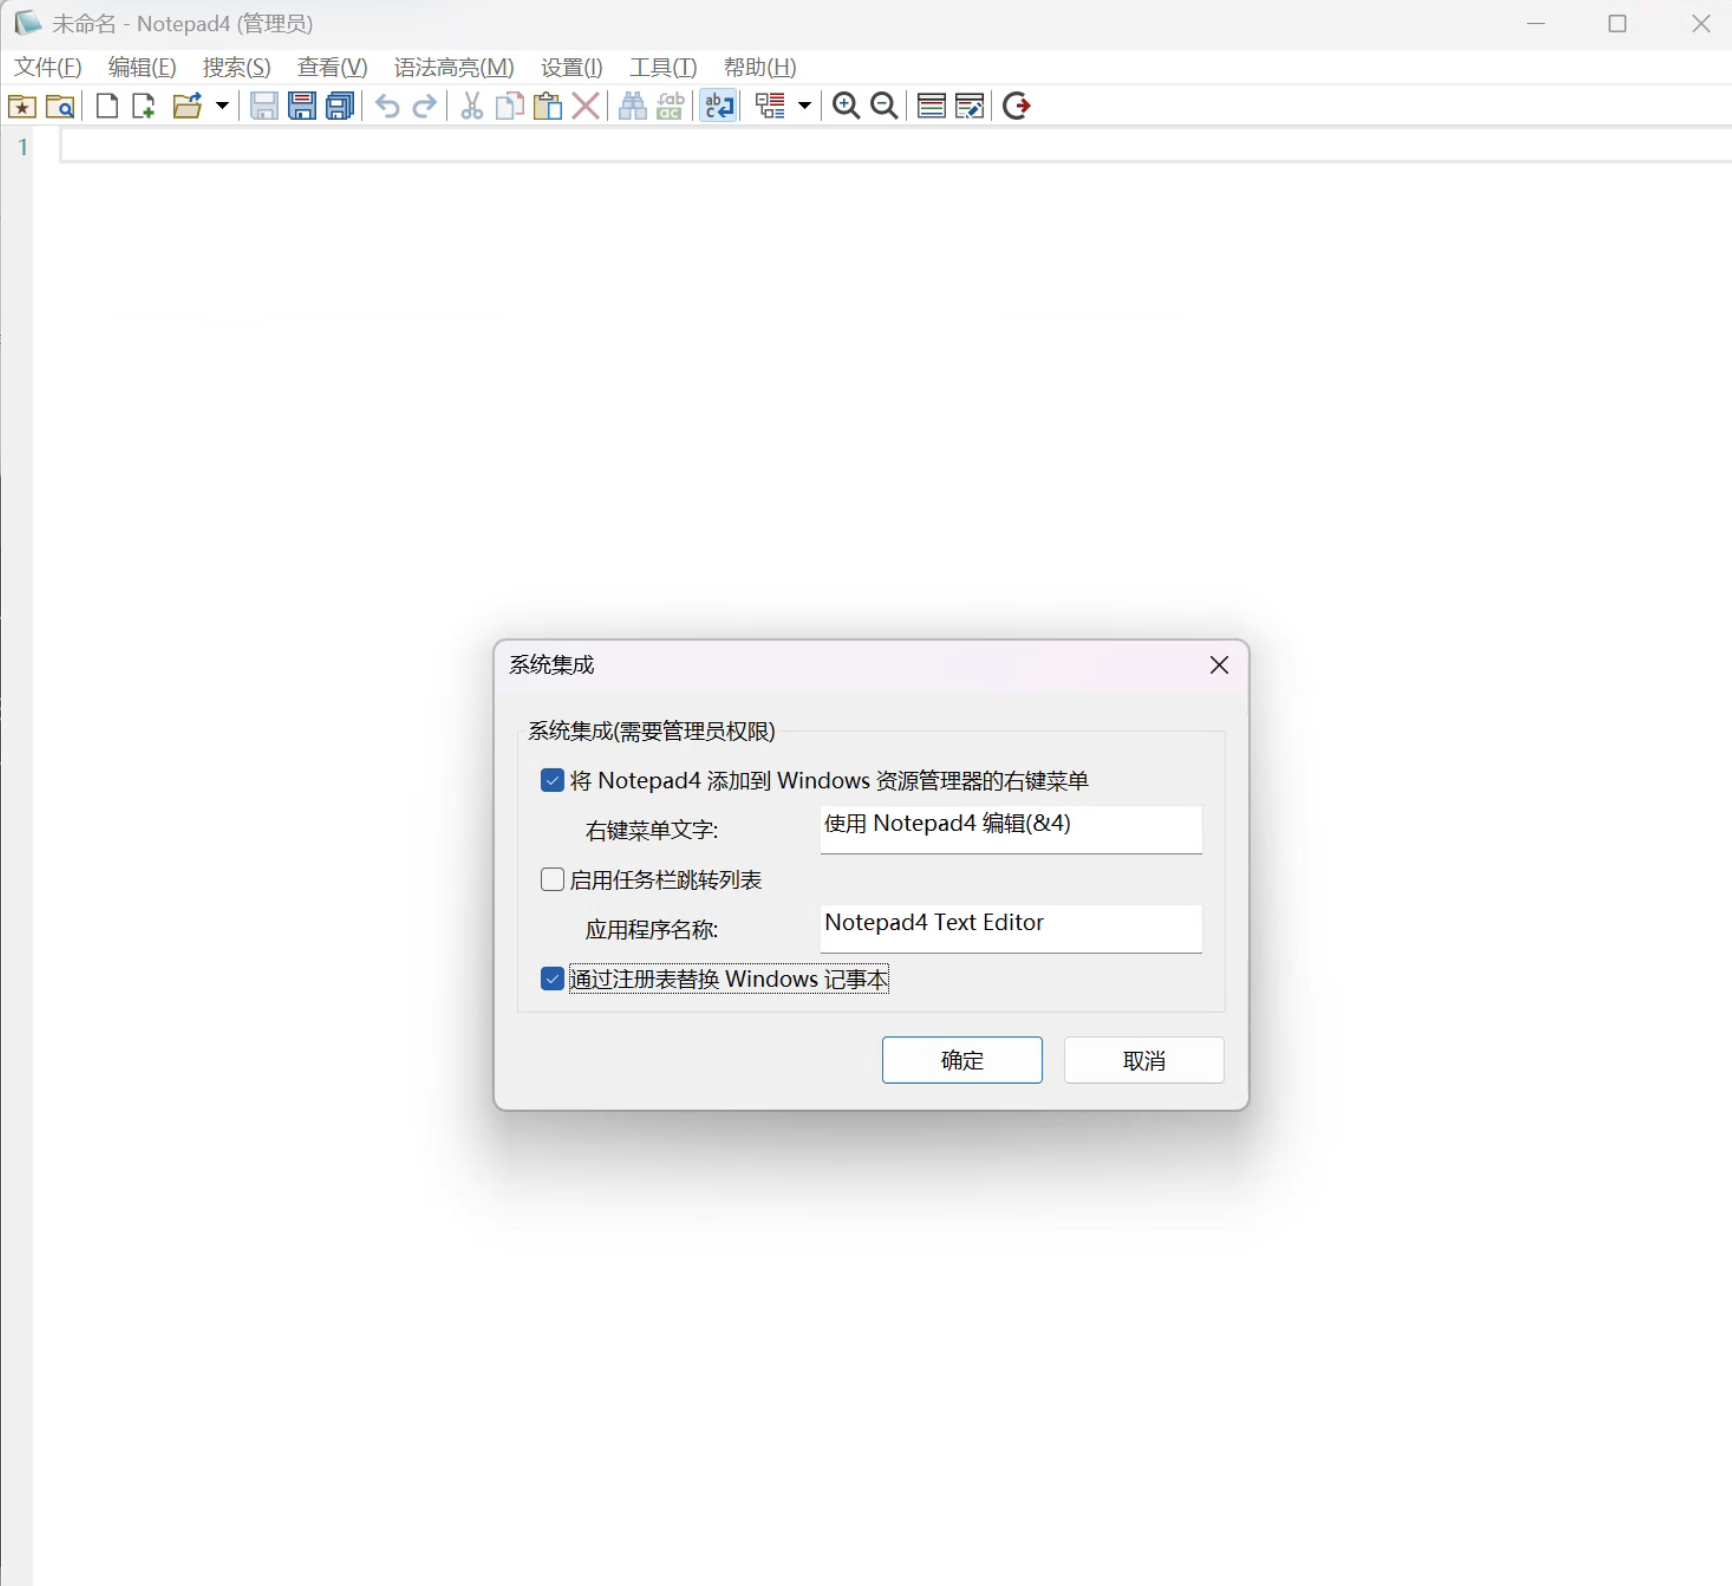
使用命令 Notepad4 打开,使用系统集成设置替换系统记事本和快捷打开方式:
5. Git for Windows
winget install --id Git.Git -e --source winget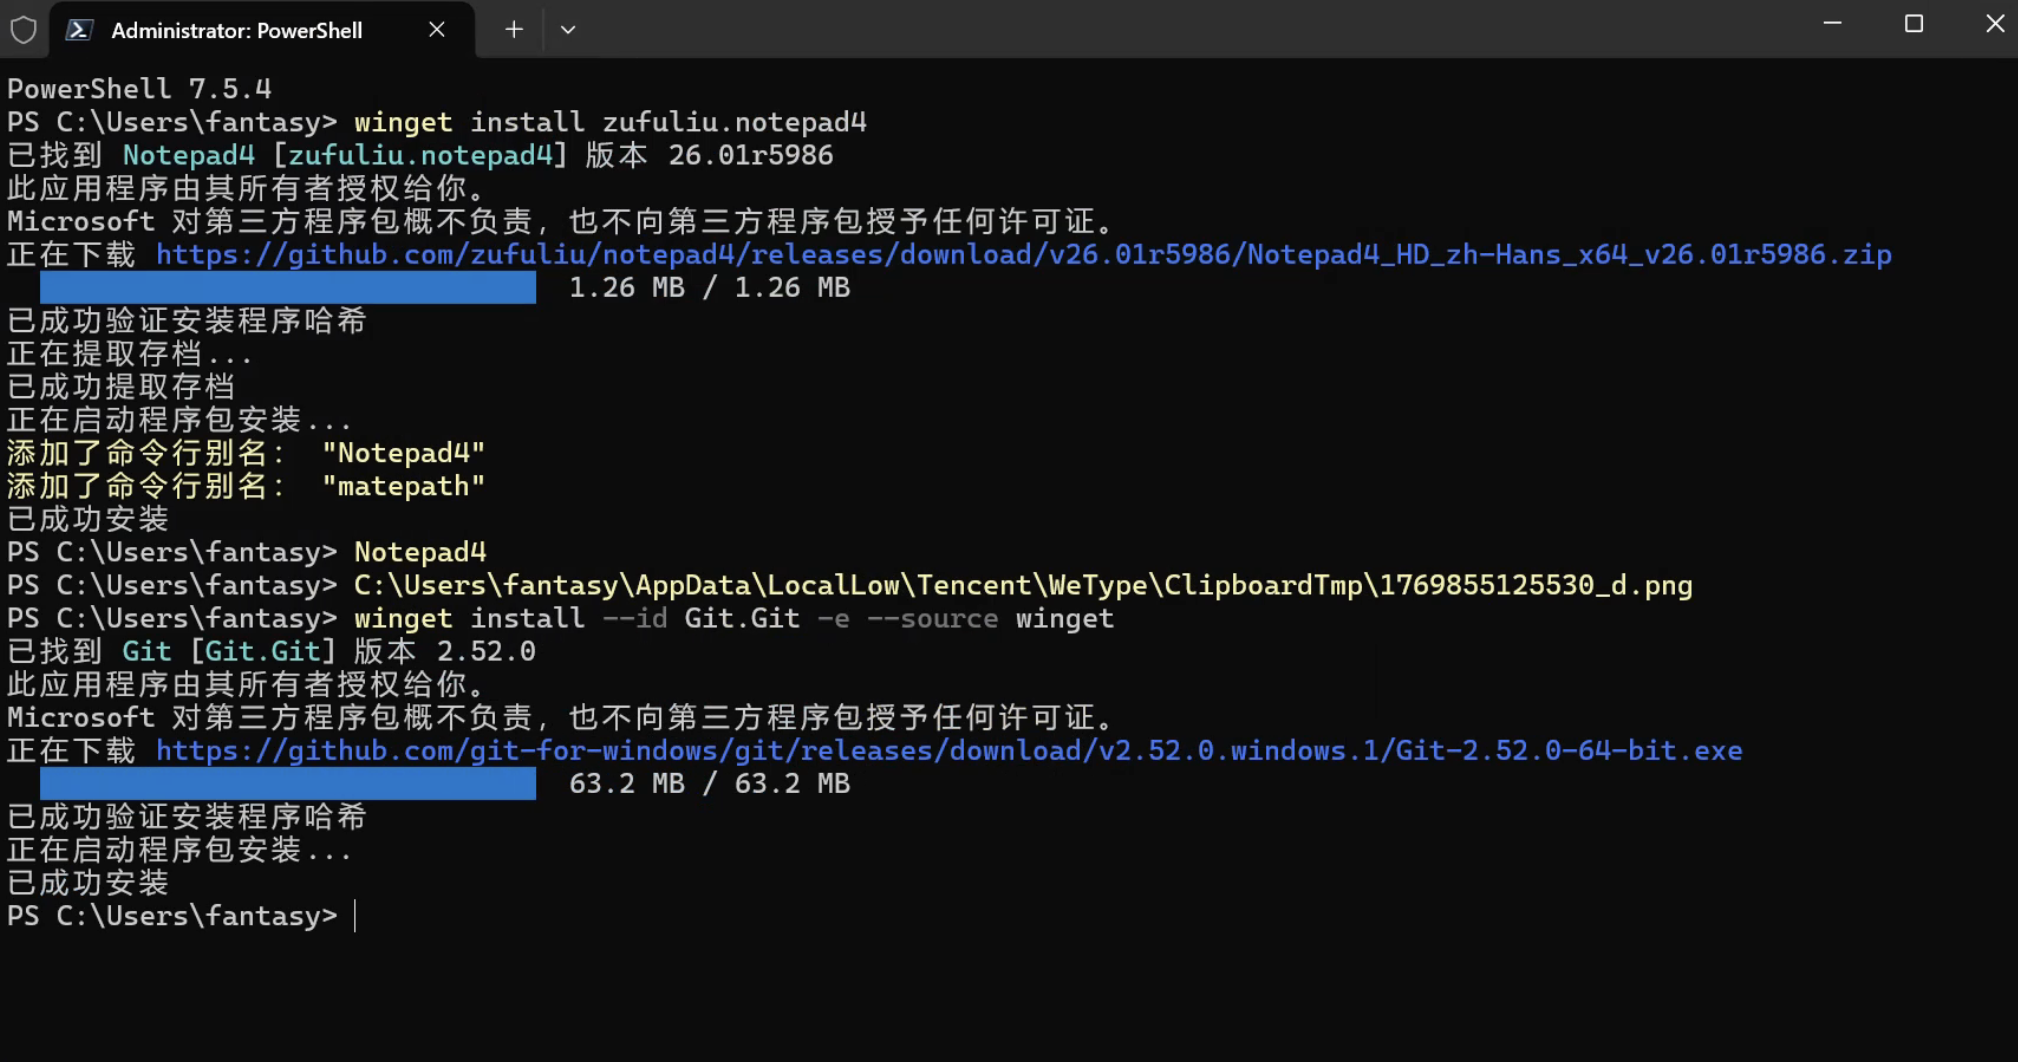
6. fnm (Node 版本管理器)
winget install Schniz.fnm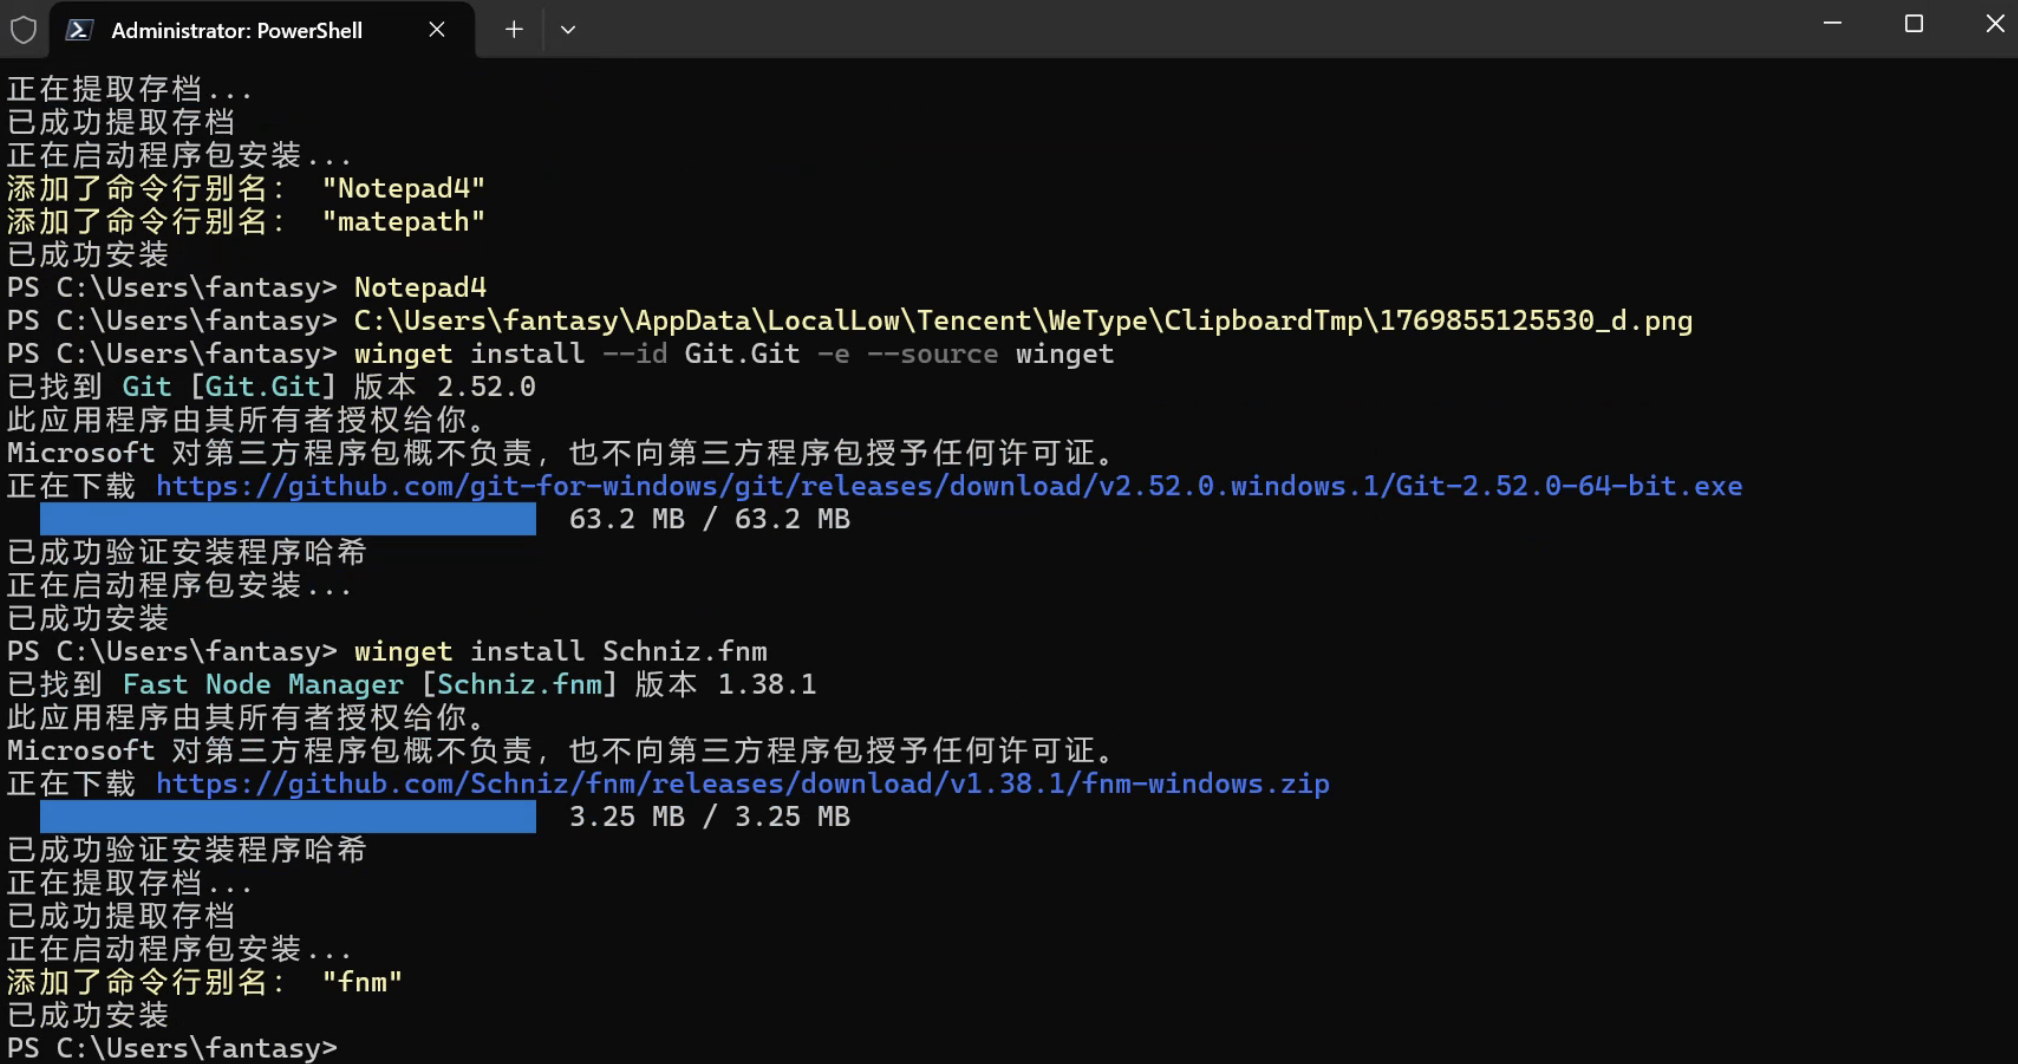
安装成功后同样关闭全部窗口,重新打开一个终端 Shell,继续安装 Node:
fnm install lts/krypton
fnm use lts/krypton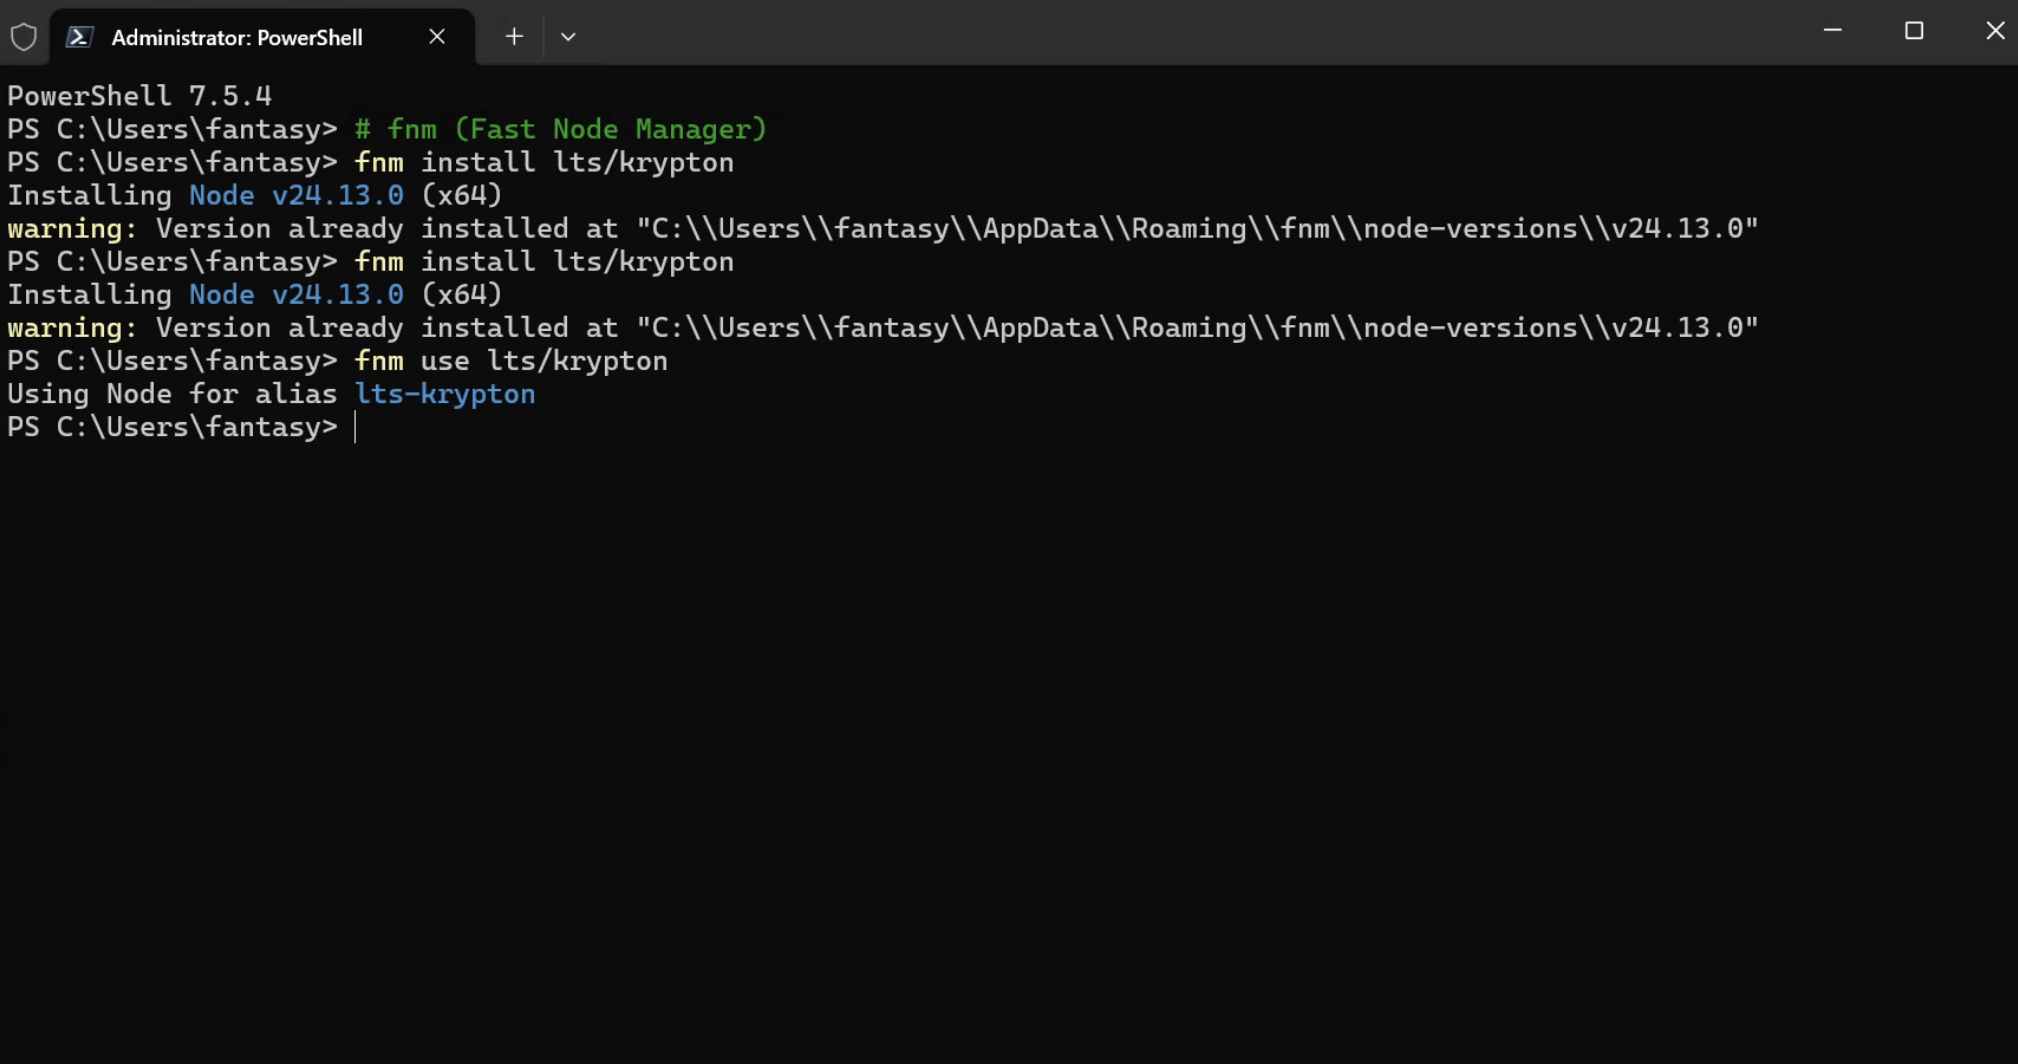
配置 FNM 环境启动
notepad $profile没有已有 PROFILE 的情况下会提示不存在,需要新建:
New-Item –Path $Profile –Type File –Force完成后再次使用命令 notepad $profile 打开,添加以下内容后保存:
fnm env --use-on-cd --shell powershell | Out-String | Invoke-Expression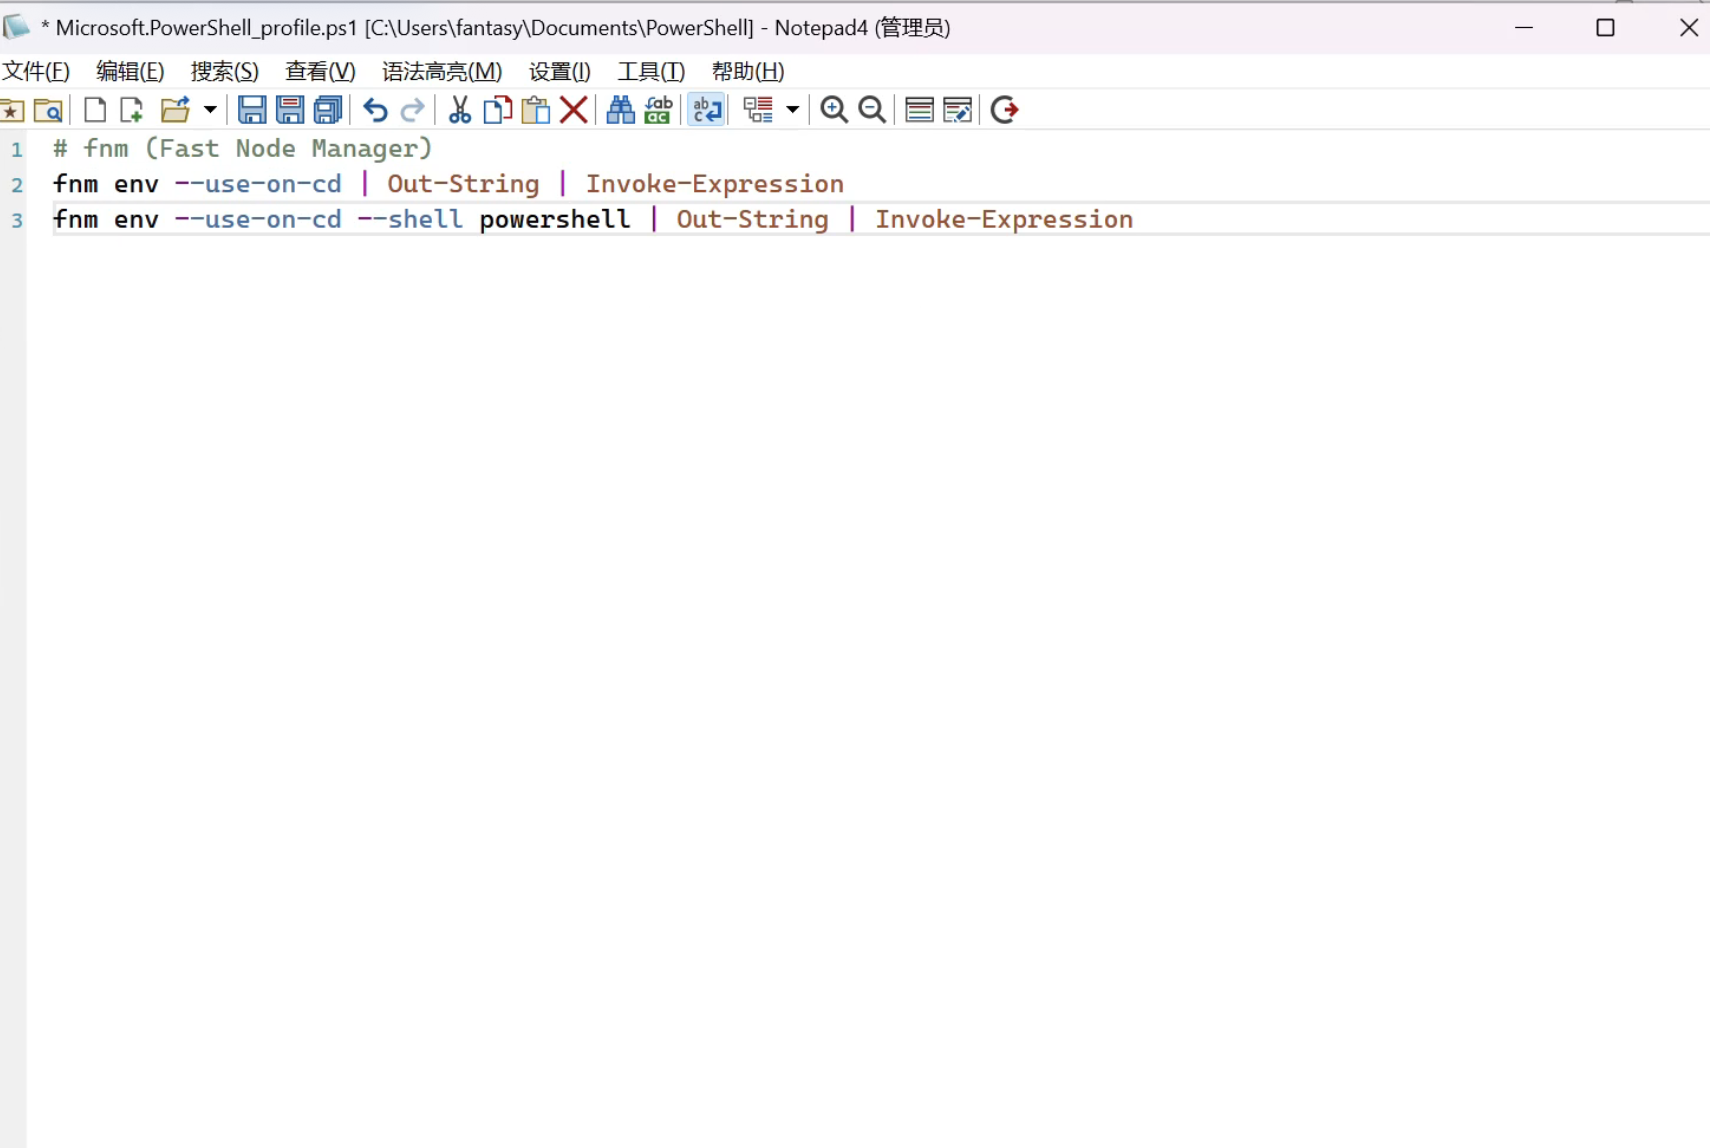
重要:同样关闭全部窗口,重新打开一个终端 Shell。
使用刚才安装的版本
fnm use lts/krypton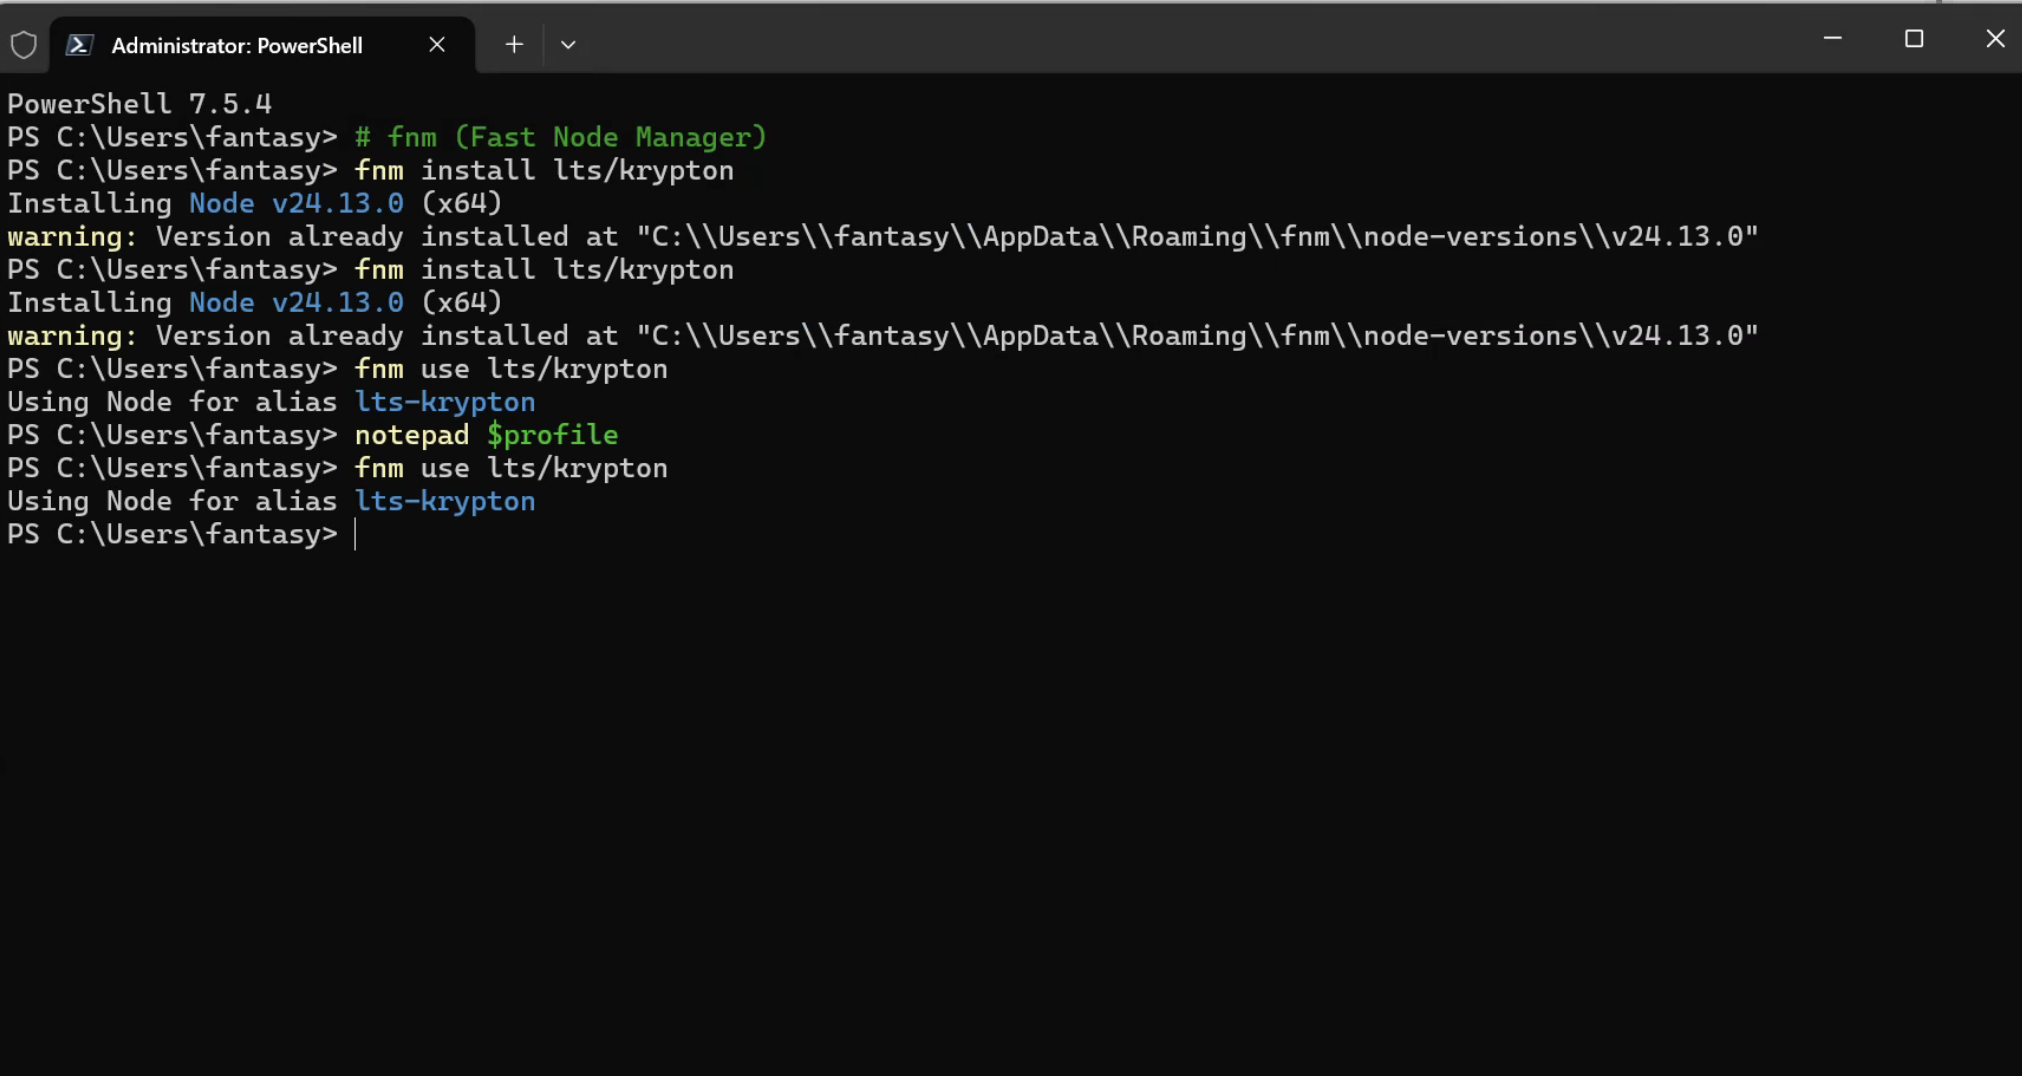
成功应用默认 Node 版本。
7. 安装 Claude Code
设定 npm 镜像源(国内环境推荐)
npm config set registry https://registry.npmmirror.com全局安装 Claude Code
npm install -g @anthropic-ai/claude-code可选设定:美化相关
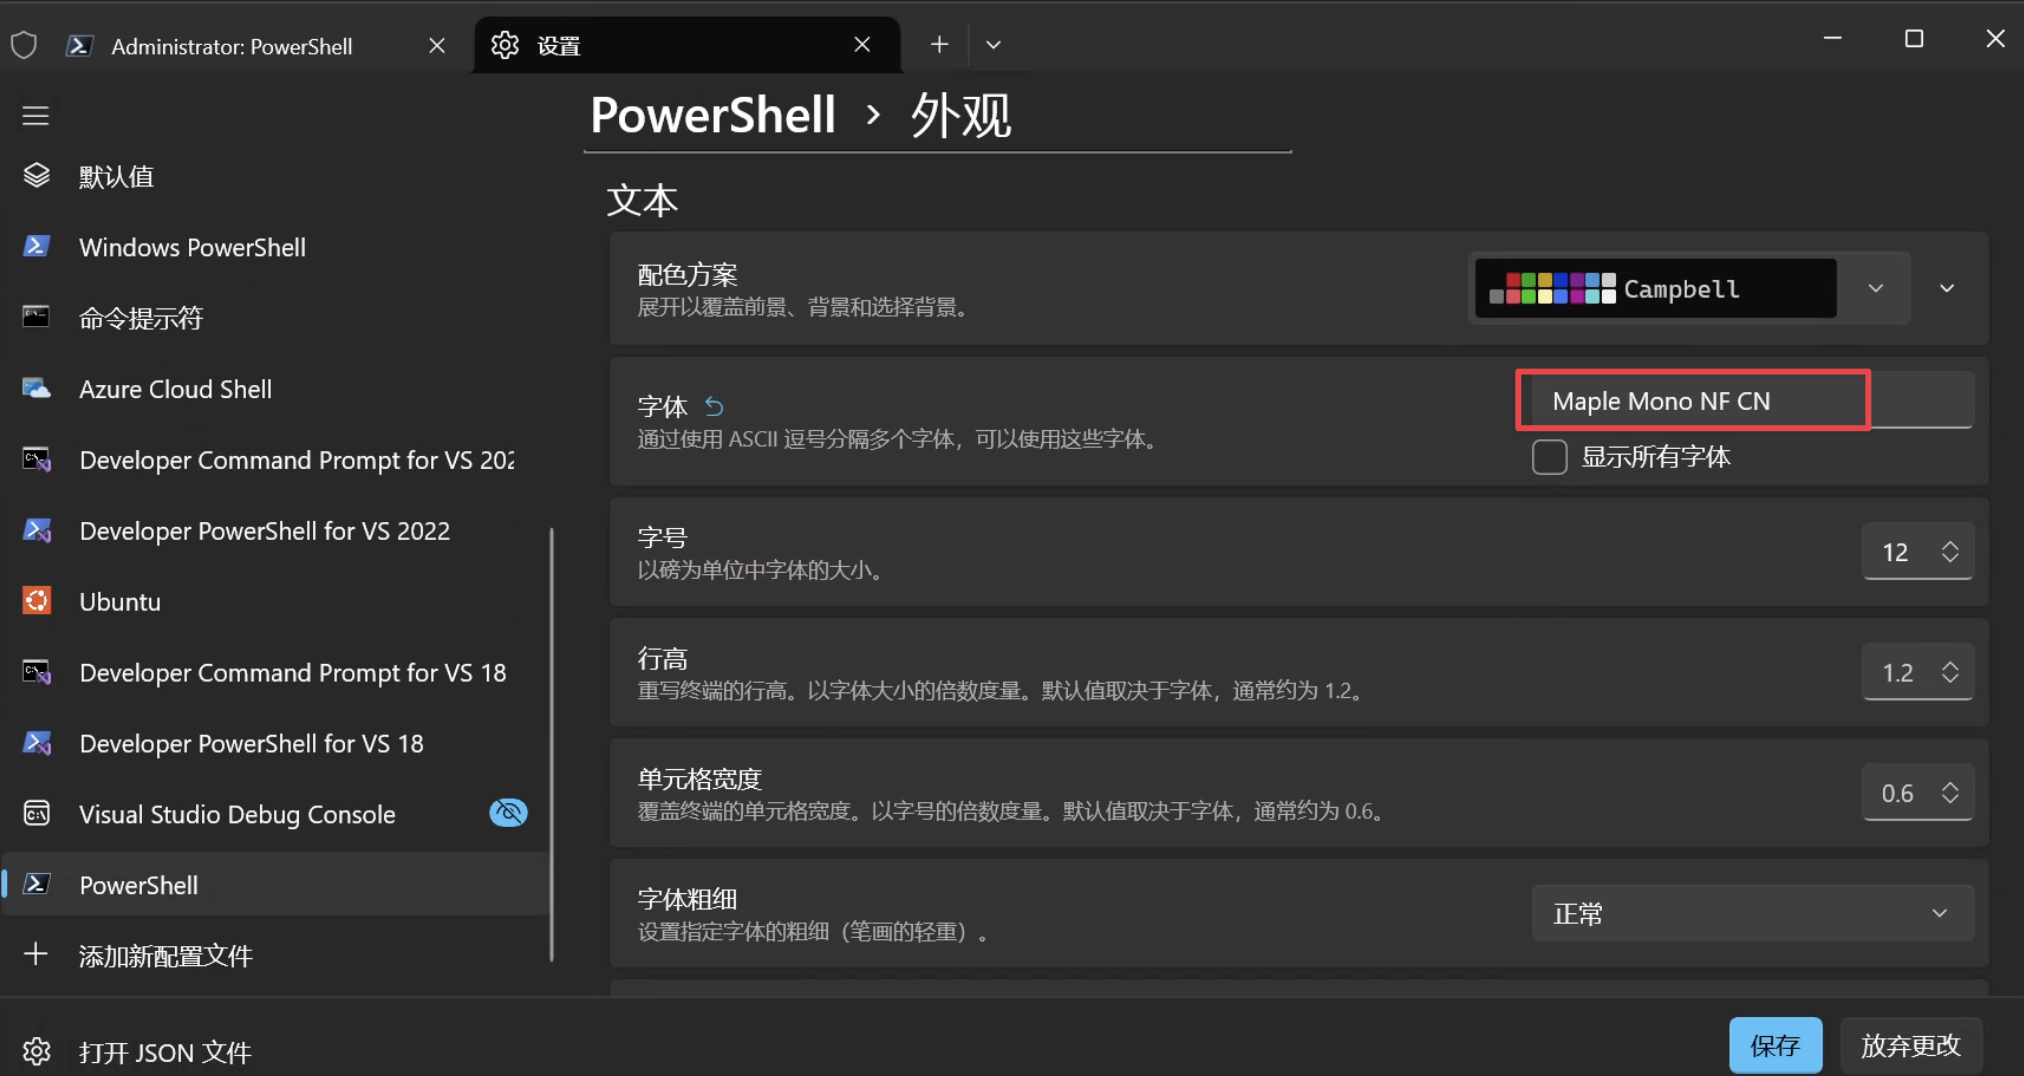
包含中文的等宽字体
下载:MapleMonoNormal-NF-CN.zip
打开 PowerShell 修改默认字体为 Maple Mono Normal NF CN:
- 点击顶部下拉箭头 → 设置
- 配置文件项中的 PowerShell → 其他设置中的外观项 → 字体选择
Oh My Posh
winget install JanDeDobbeleer.OhMyPosh --source winget --scope user --force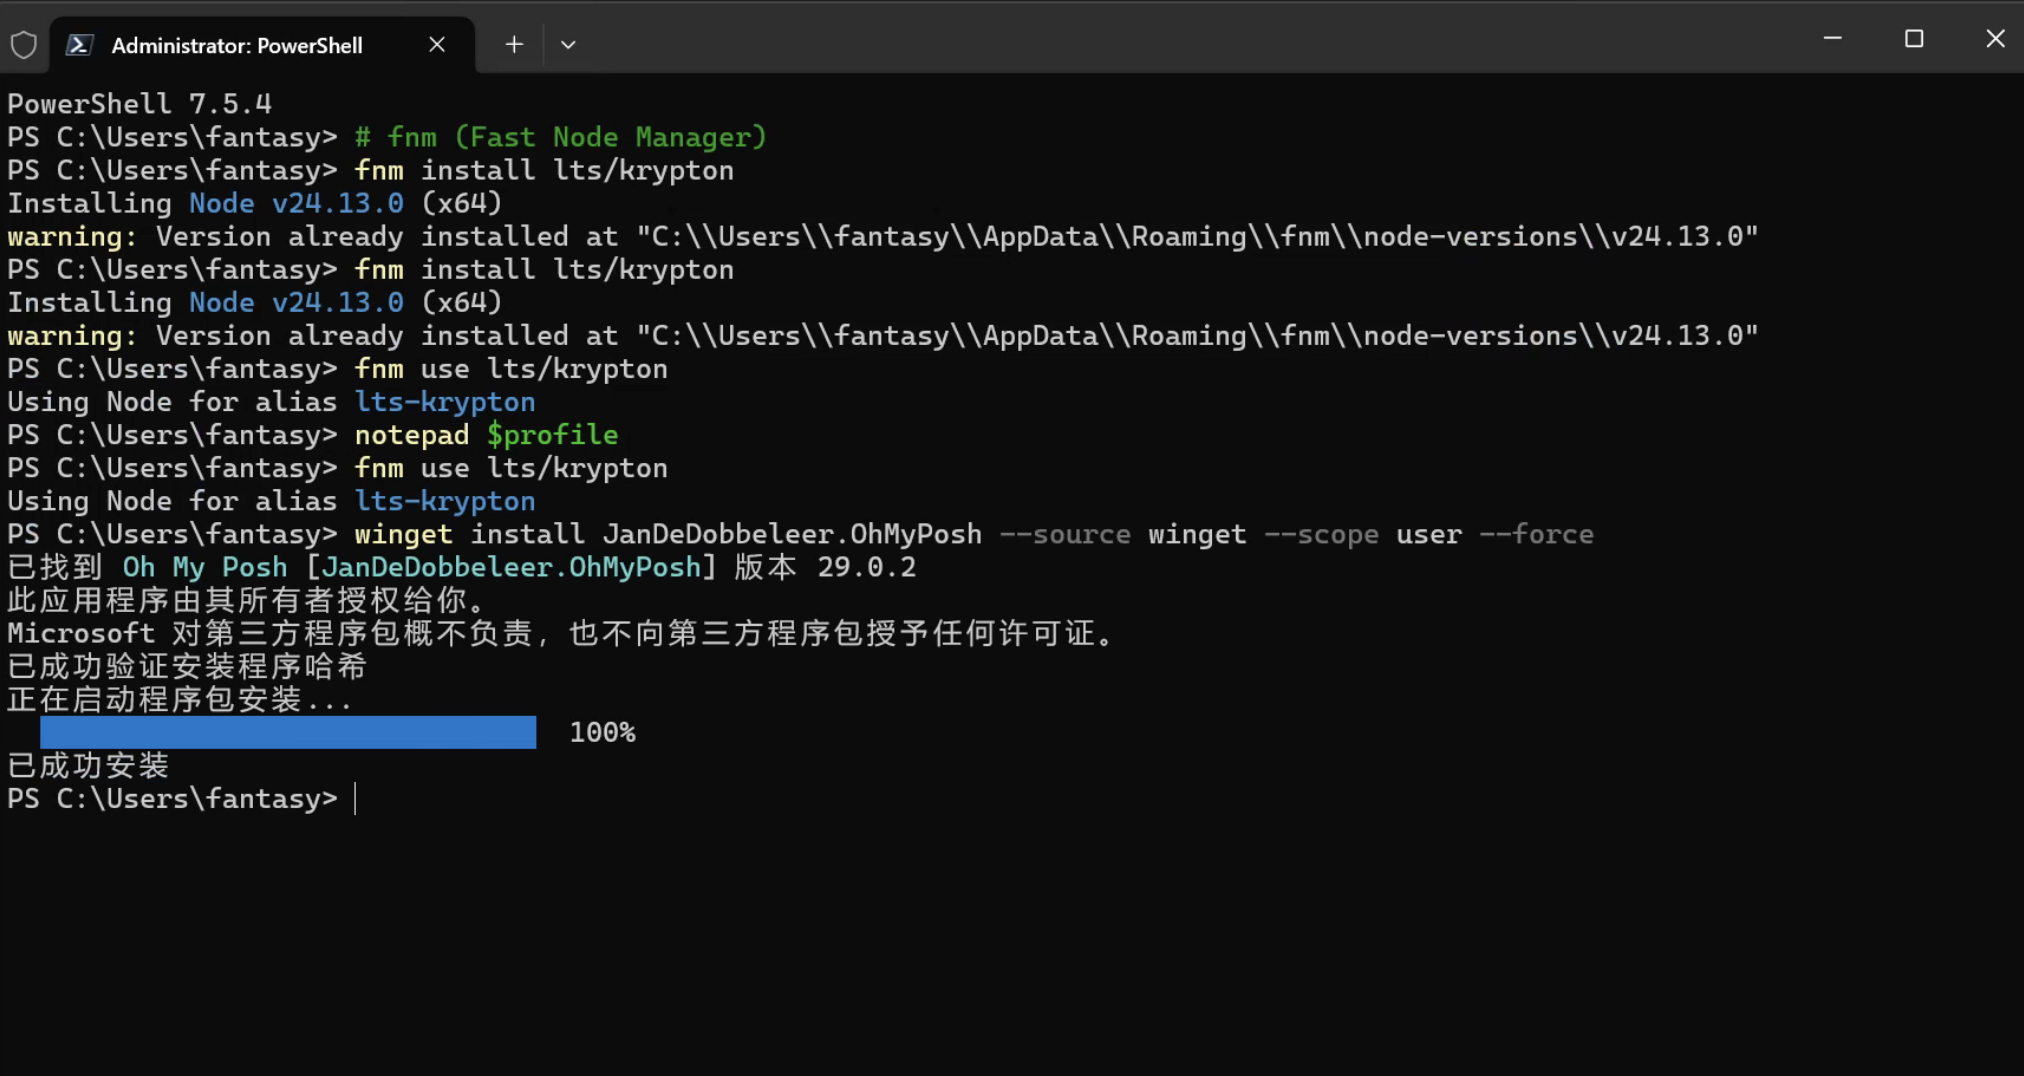
同样打开 PROFILE 新增激活 OhMyPosh:
notepad $profile添加以下内容:
oh-my-posh init pwsh --eval | Invoke-Expression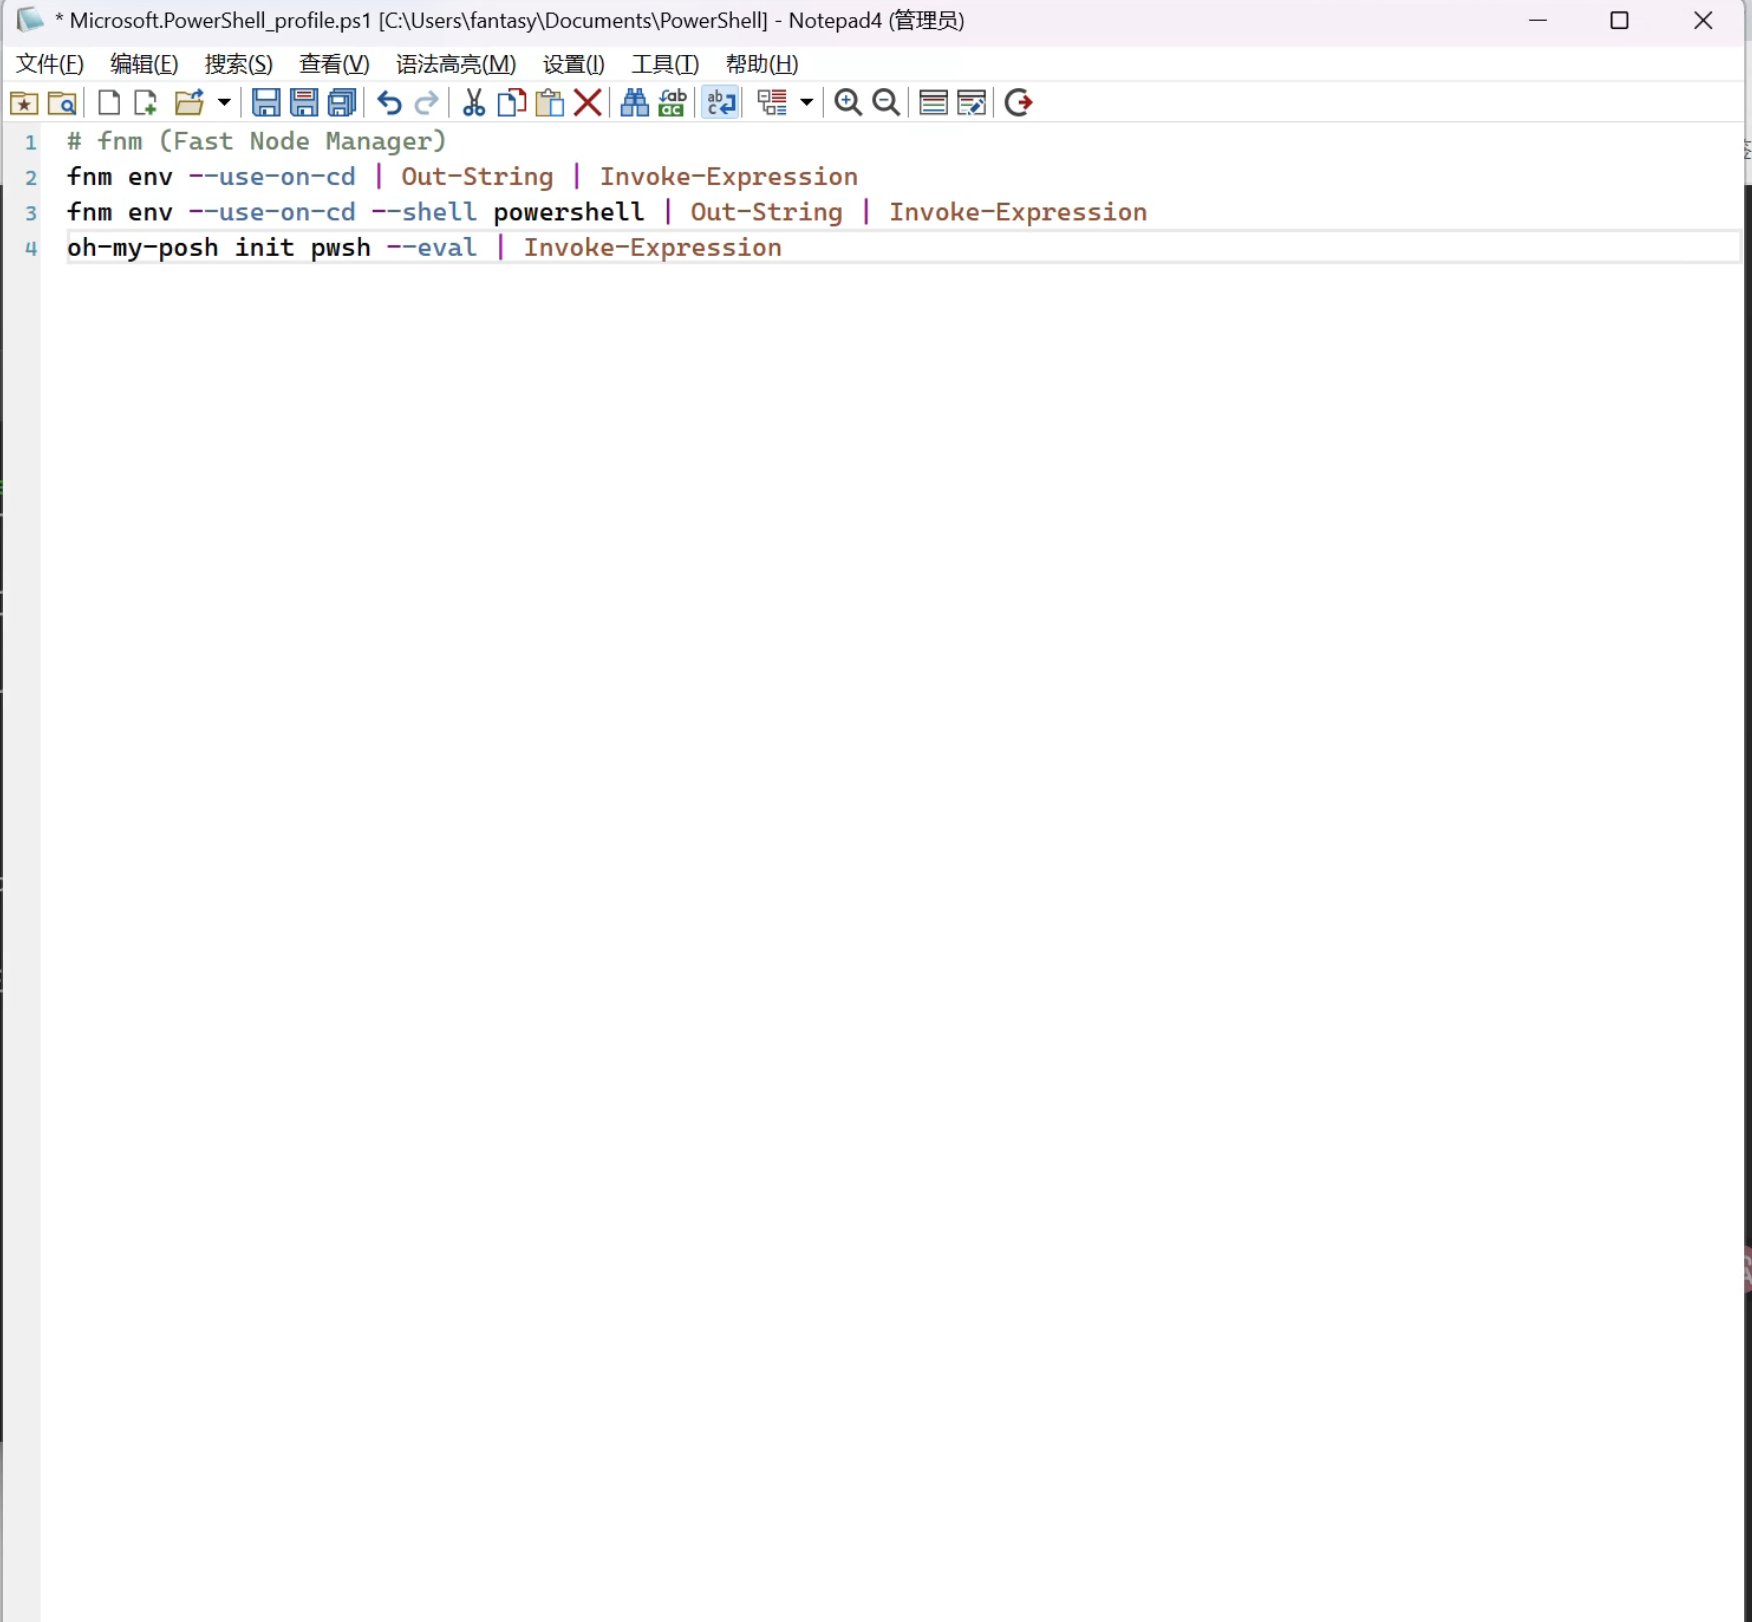
主题样式很多,任君挑选:Themes | Oh My Posh
macOS 安装
终端选择
说明:iTerm2 和 Ghostty 选一个安装即可
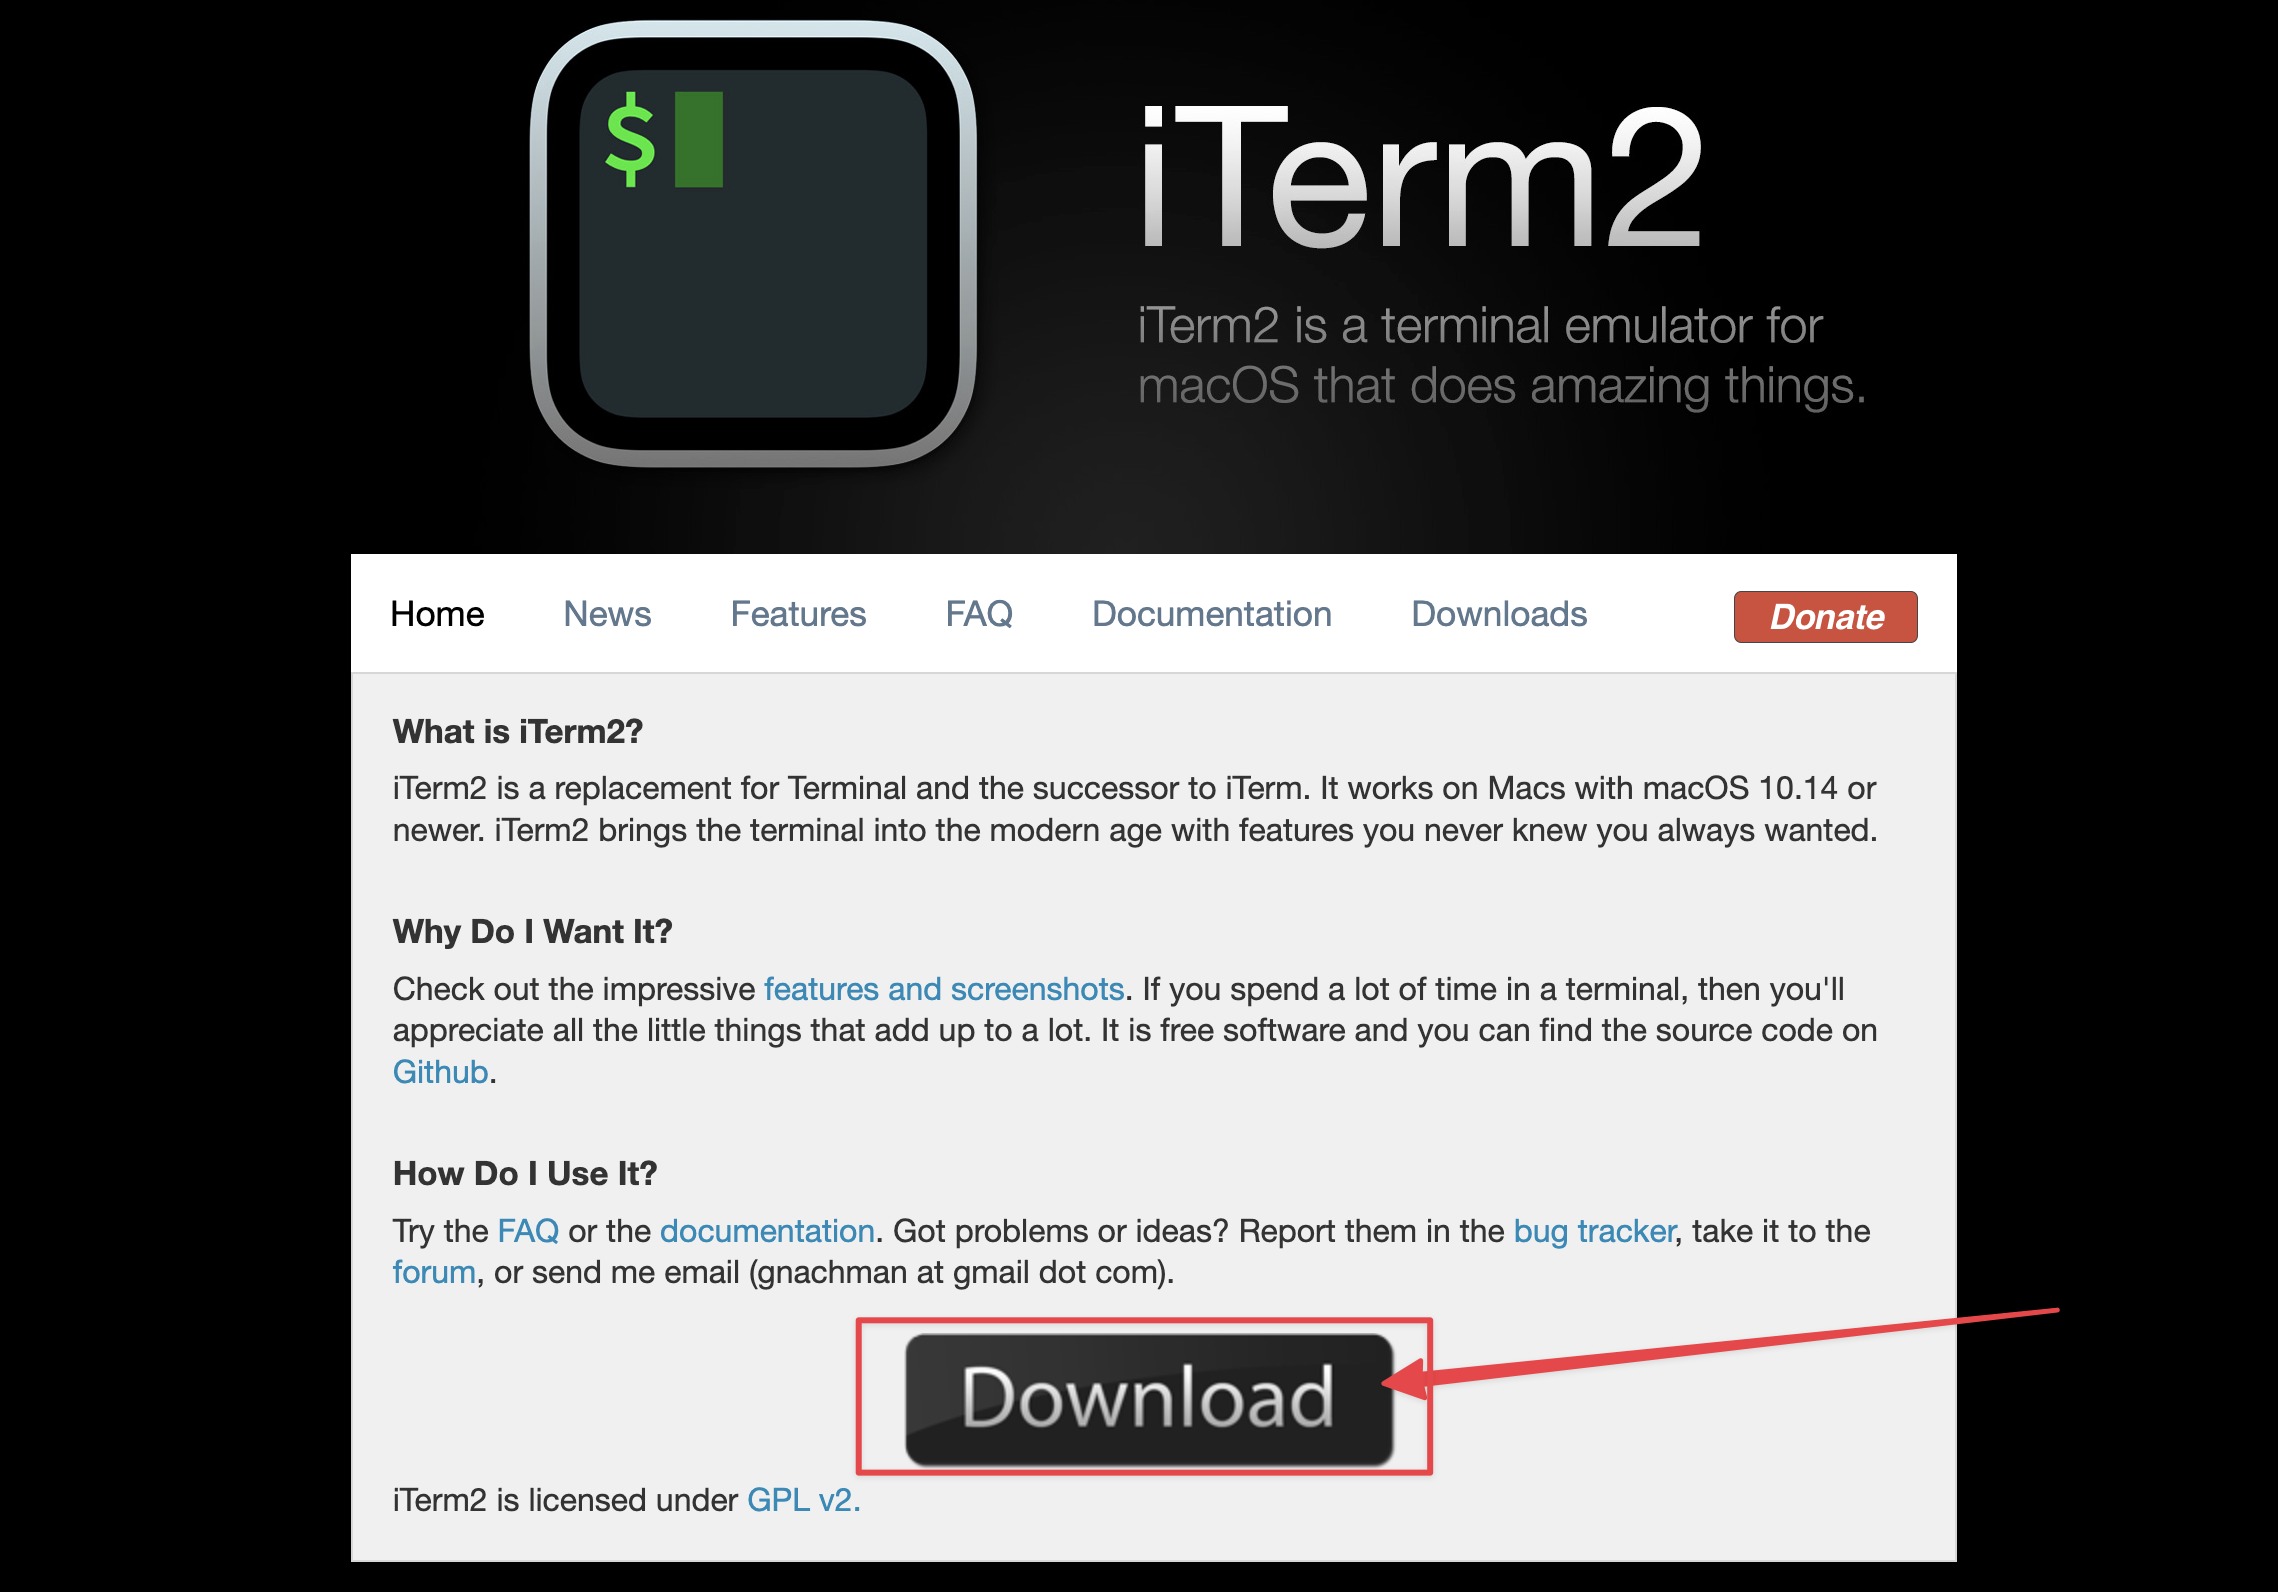
方案一:iTerm2
下载解压安装即可:
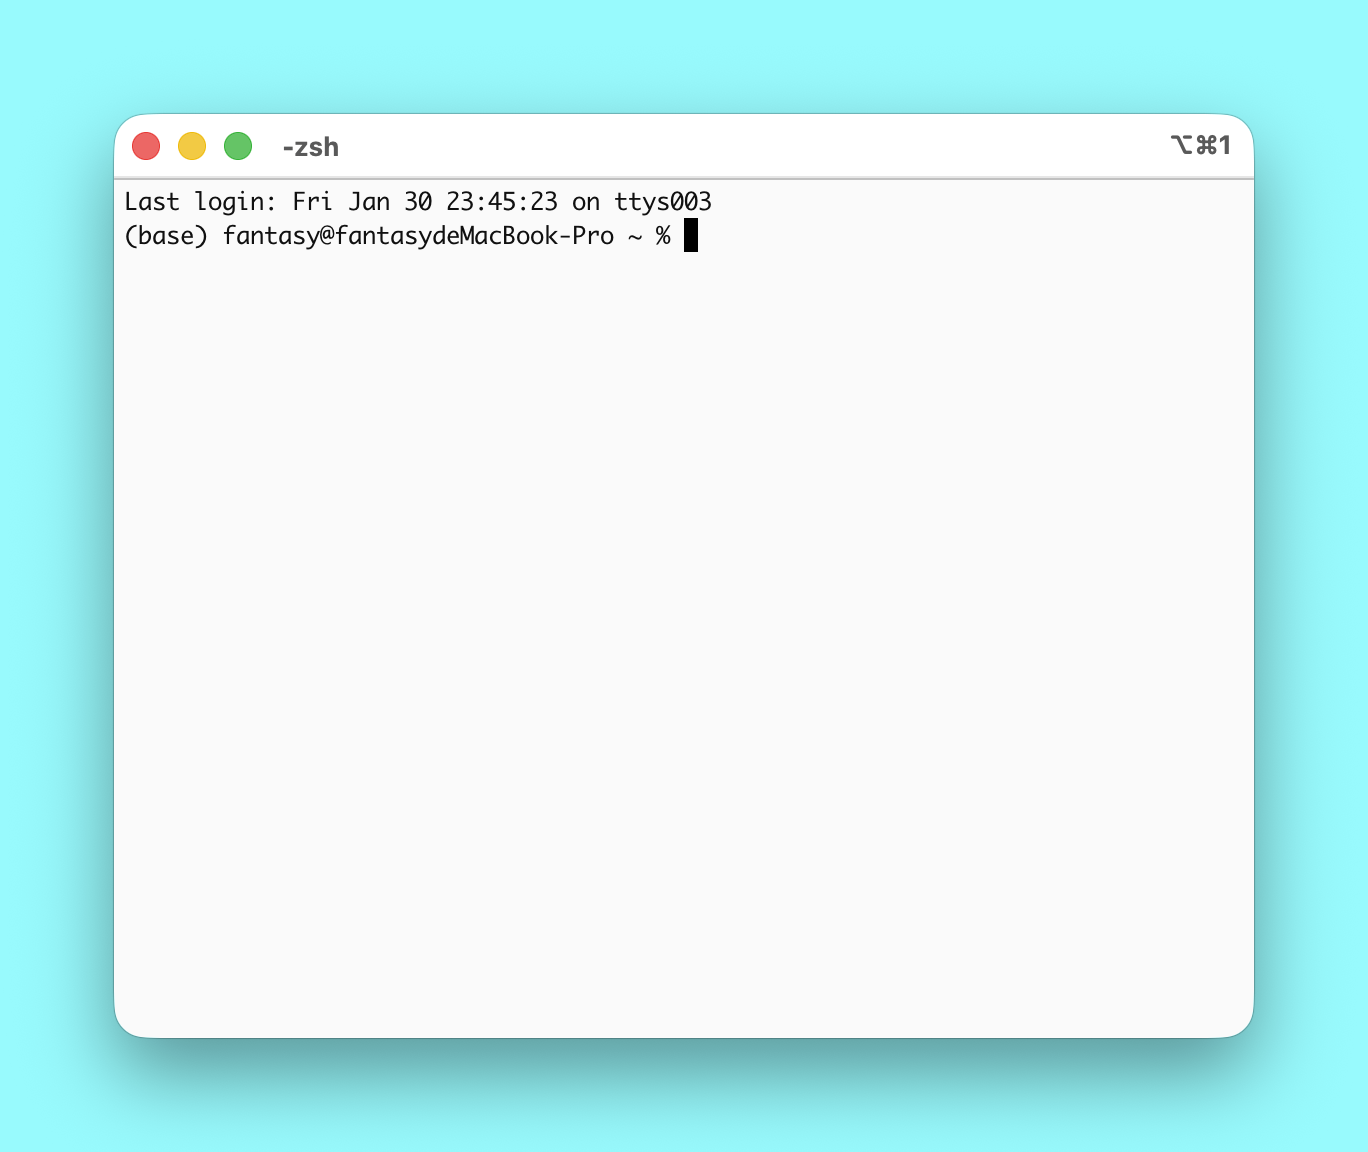
下载的压缩包解压完是这样的:

把这个文件拷贝粘贴或者拖动到应用程序文件夹中:

双击打开即可使用:
方案二:Ghostty
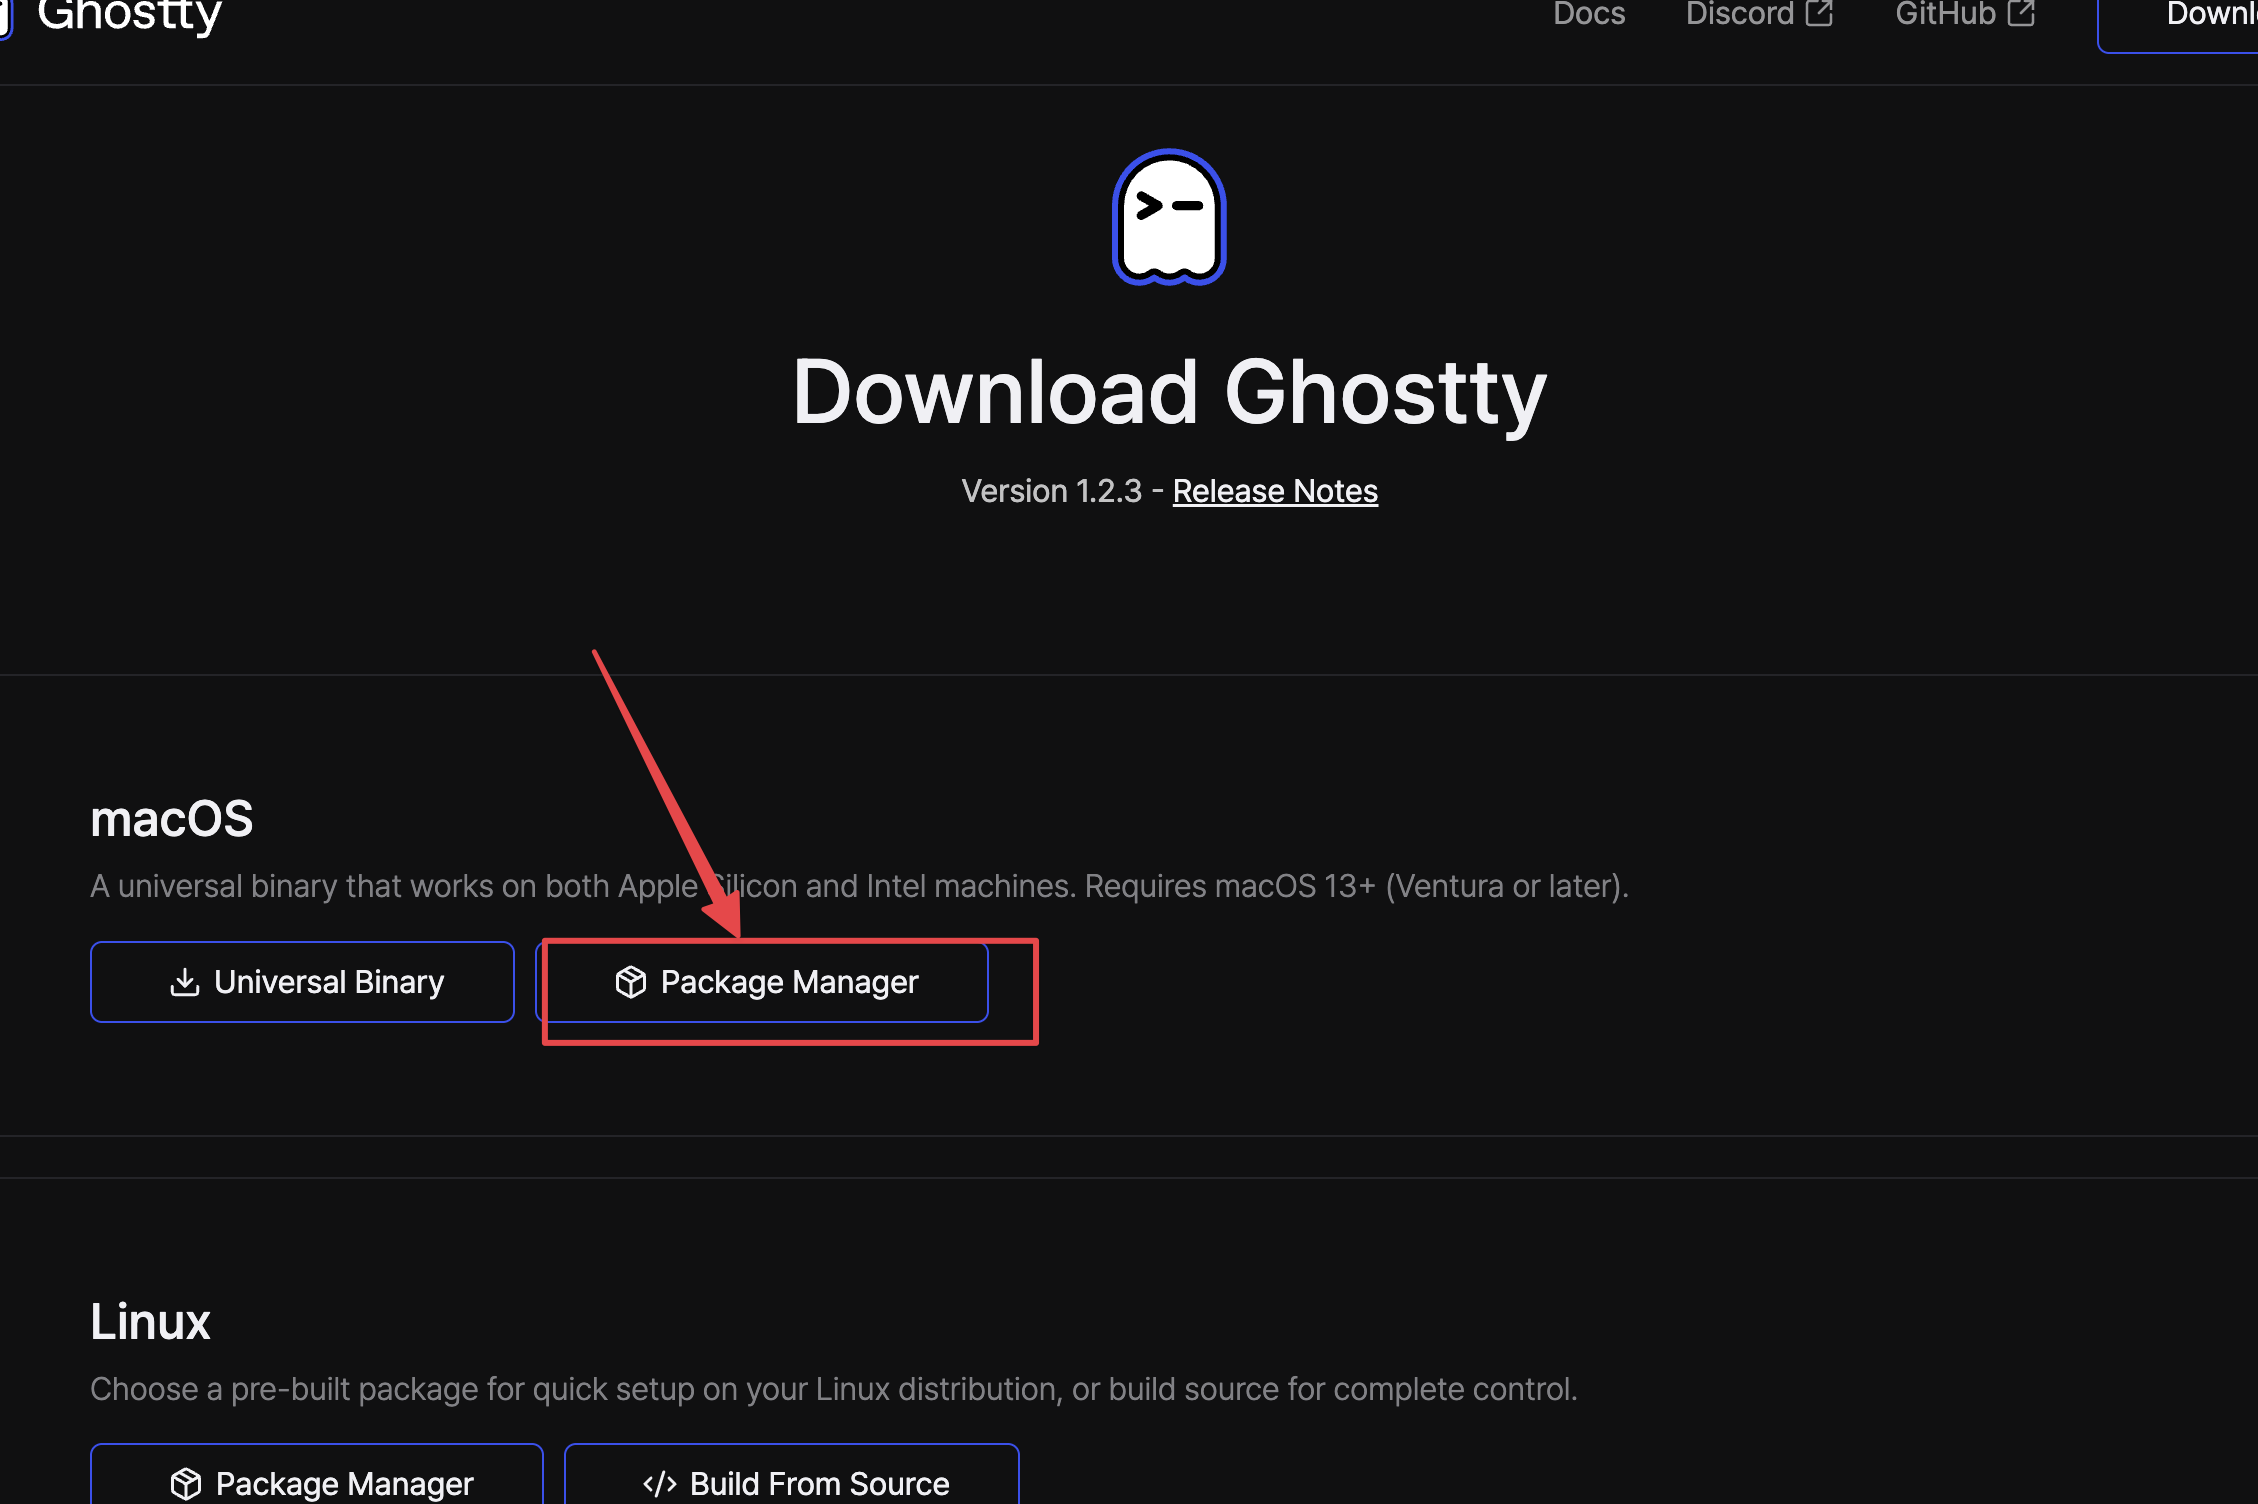
点击下载:
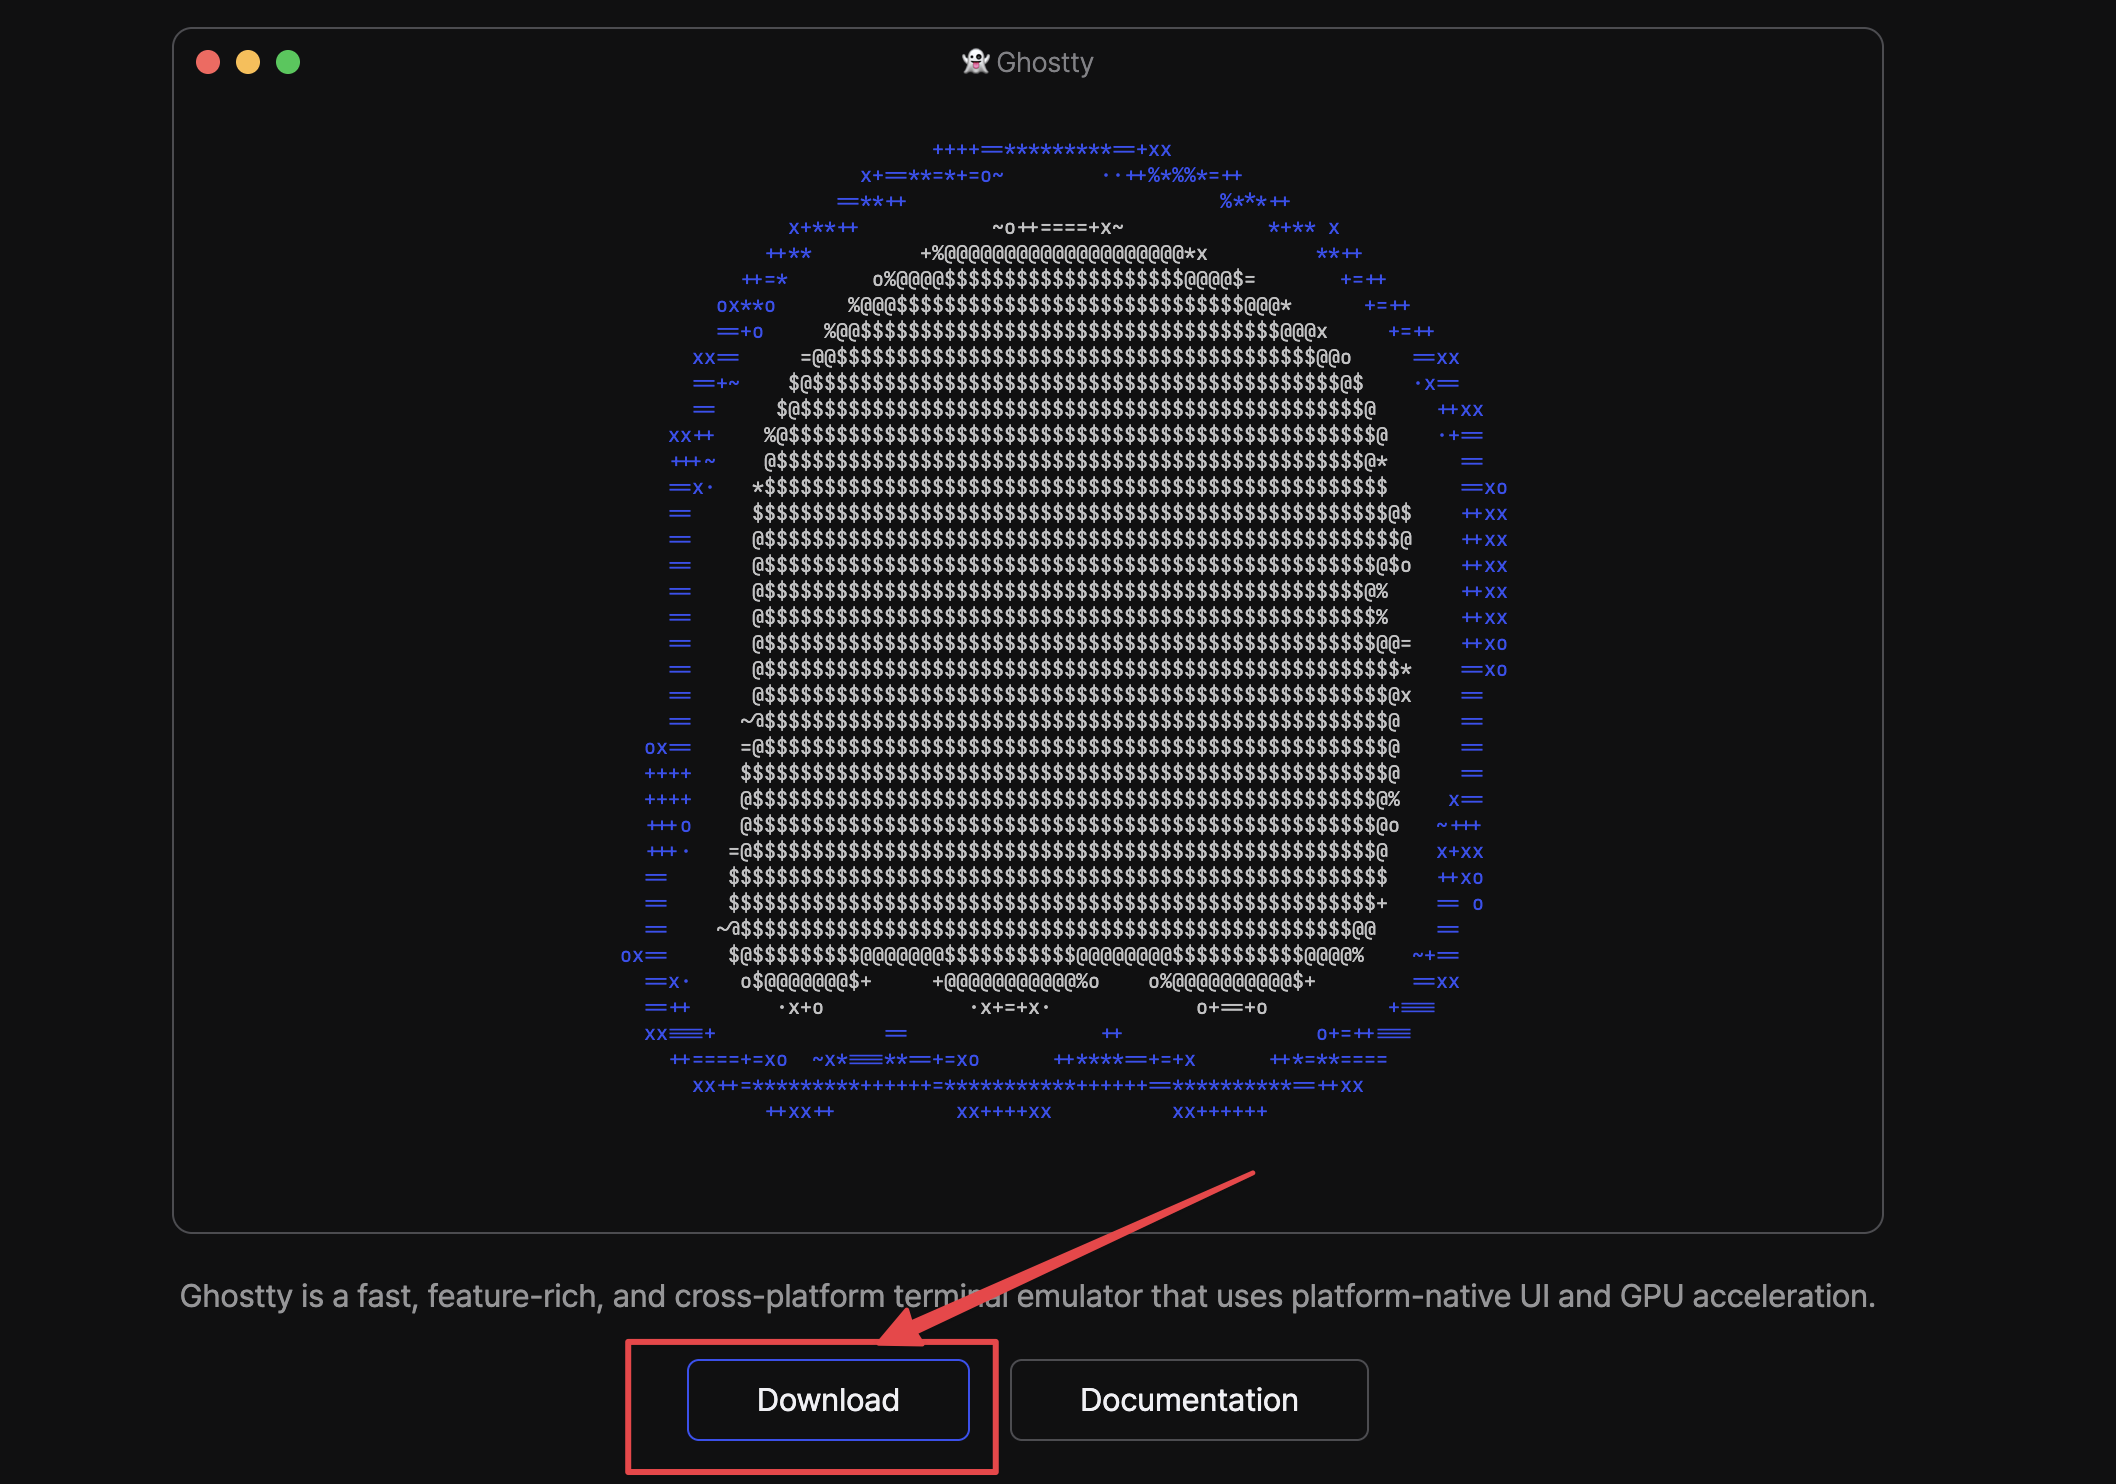
选择打包的安装包,按照提示安装,一路下一步:
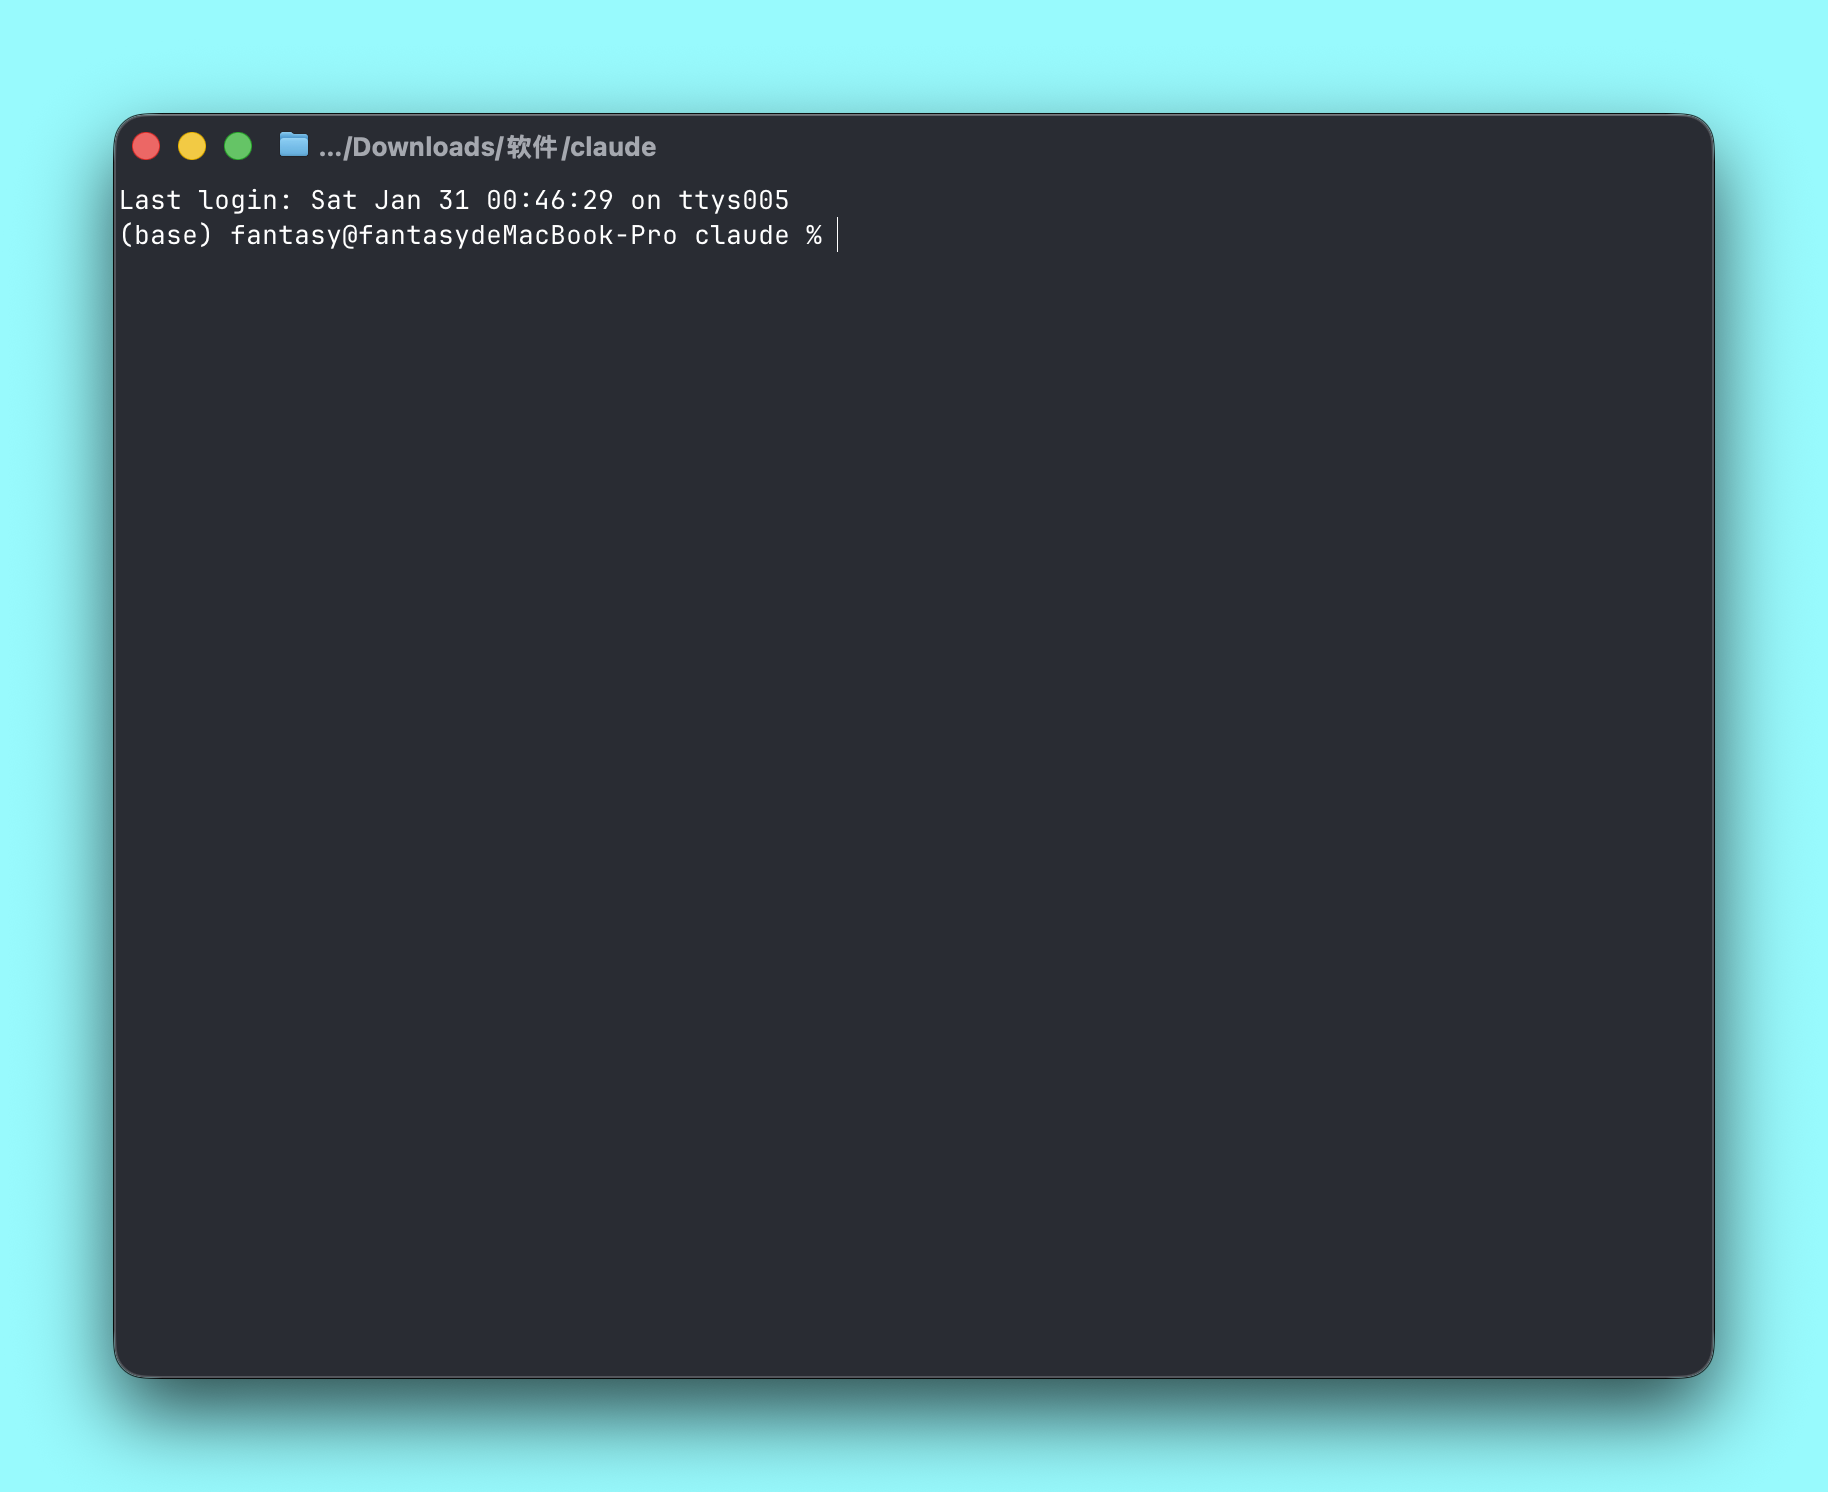
打开 Ghostty:
CCometixLine 安装
项目地址:https://github.com/Haleclipse/CCometixLine
CCometixLine 是基于 Rust 的高性能 Claude Code 状态栏工具,集成 Git 信息、使用量跟踪、交互式 TUI 配置和 Claude Code 补丁工具。
安装
# 全局安装(推荐)
npm install -g @cometix/ccline

# 使用镜像源加速下载(国内环境)
npm install -g @cometix/ccline --registry https://registry.npmmirror.com

# 或使用 yarn
yarn global add @cometix/ccline

# 或使用 pnpm
pnpm add -g @cometix/ccline
Claude Code 配置
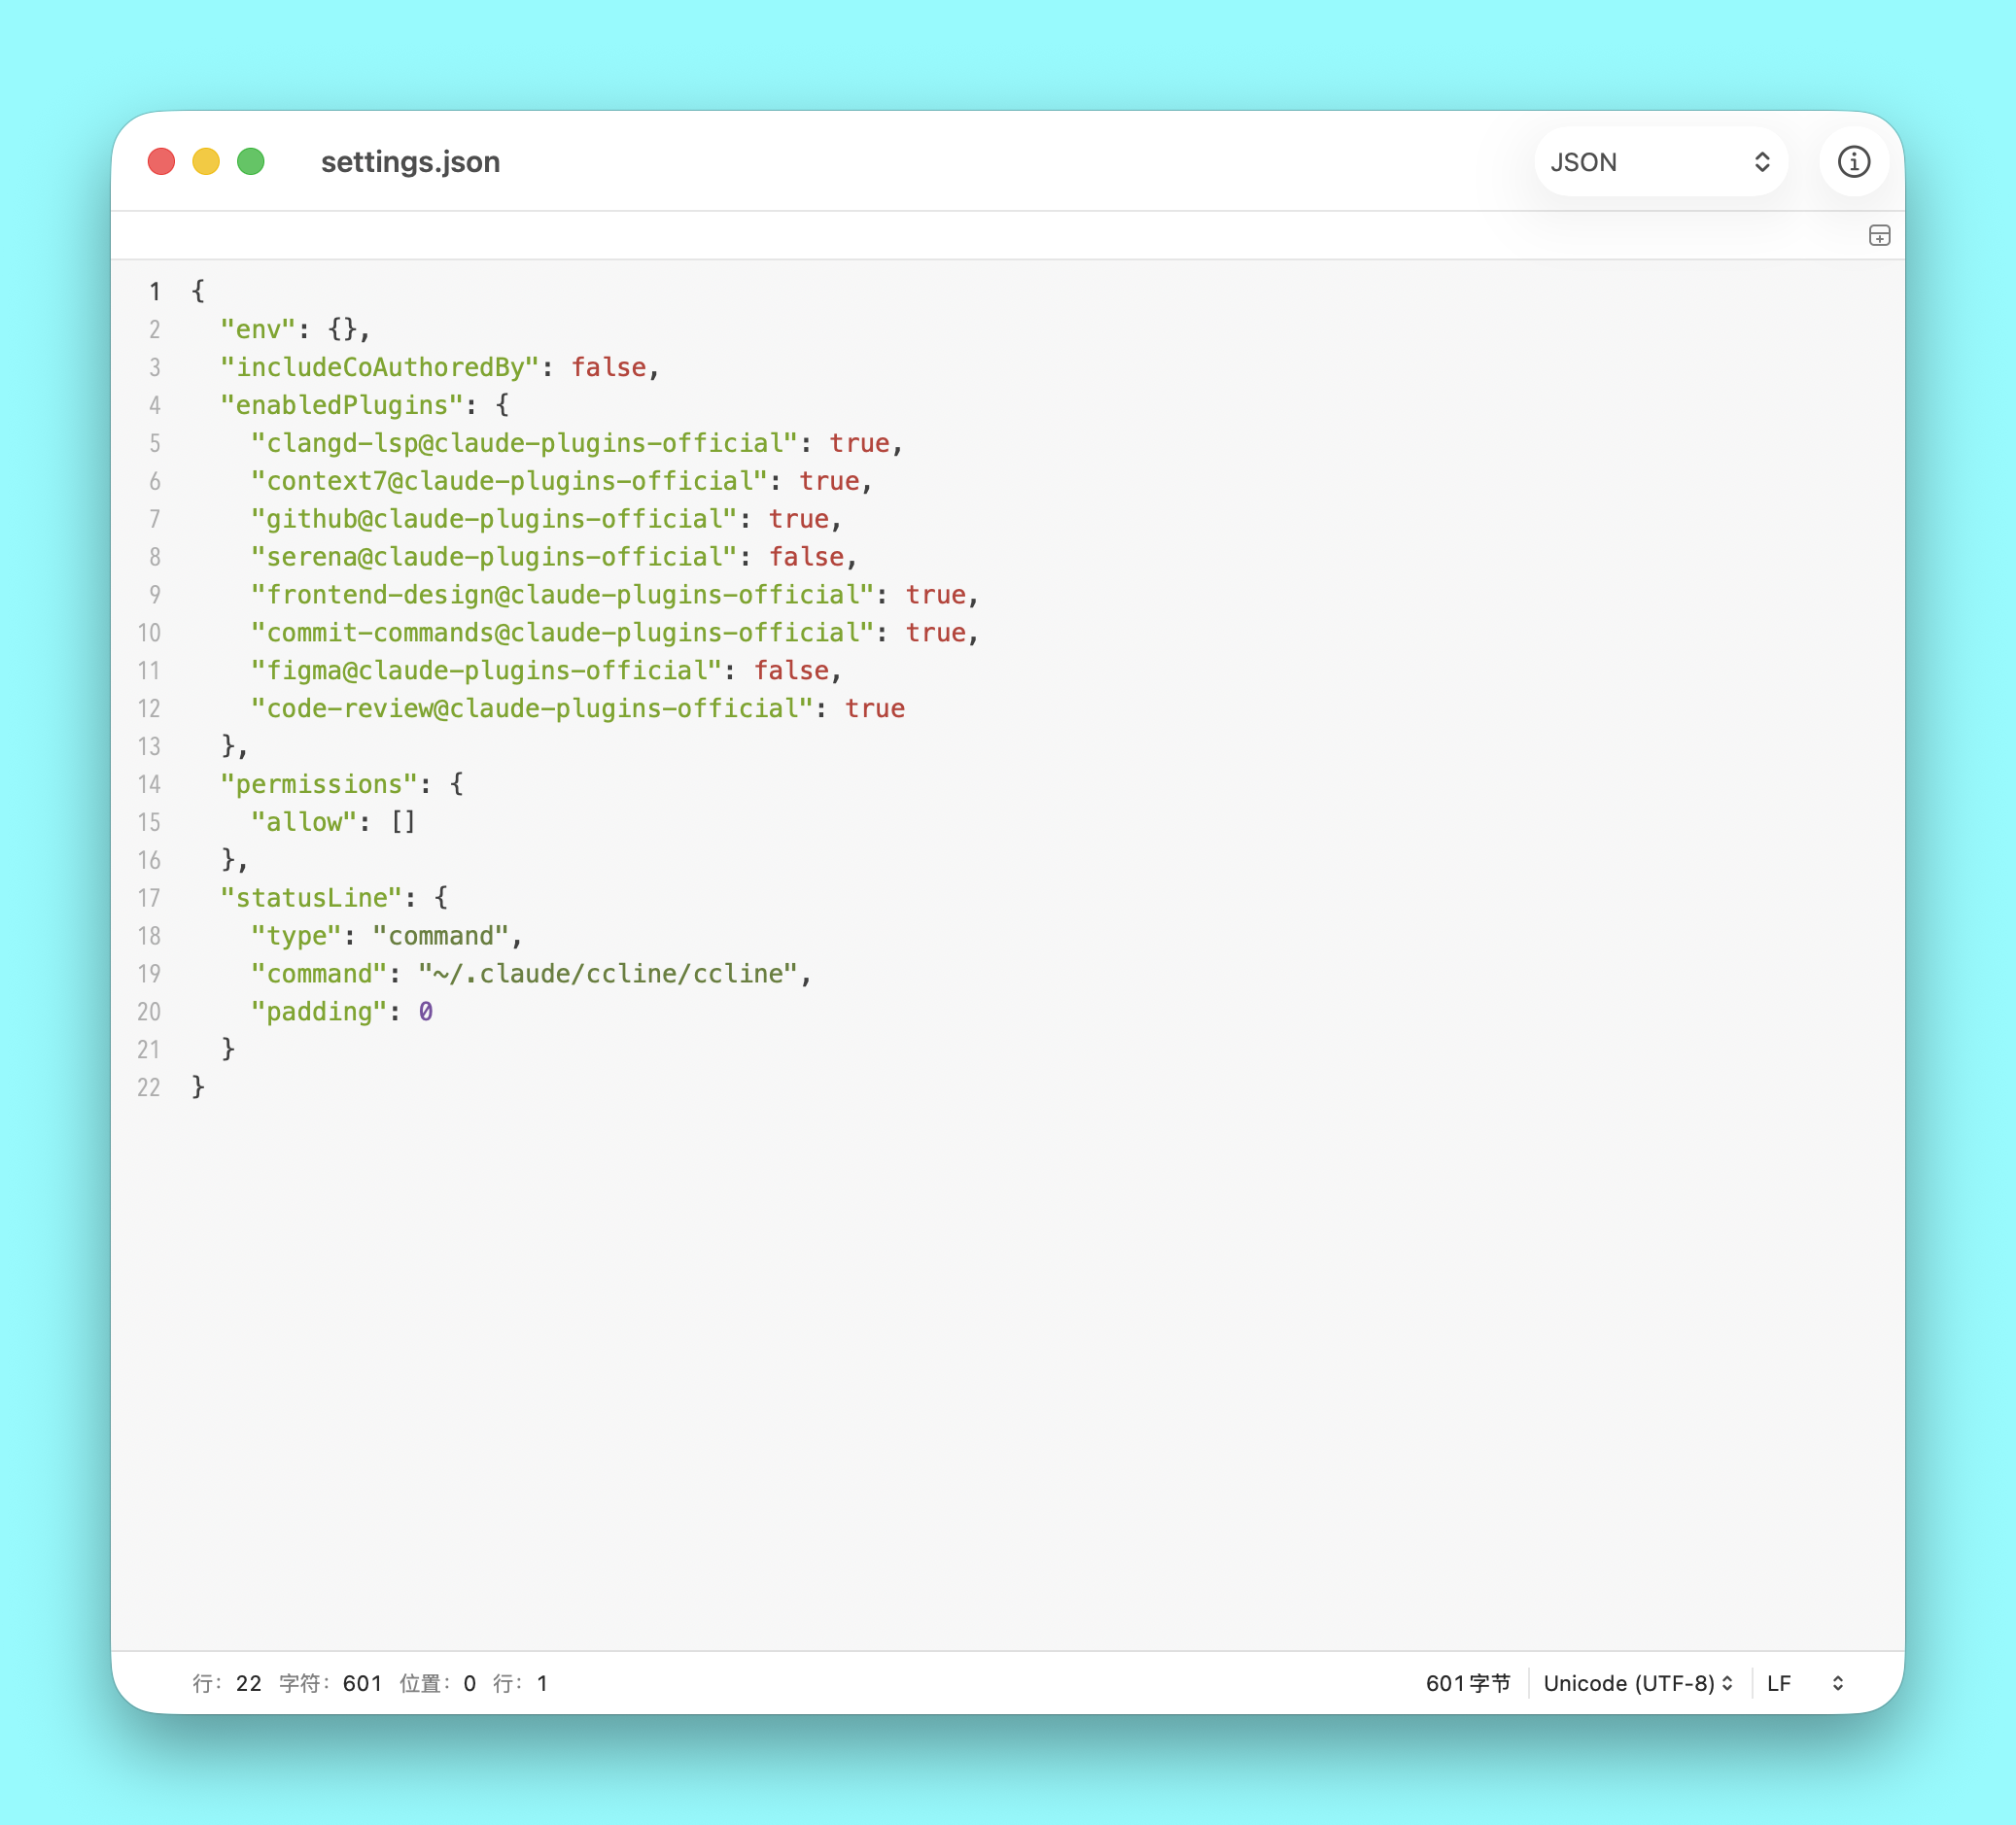
添加到 Claude Code settings.json:
Linux / macOS:
{
  "statusLine": {
    "type": "command",
    "command": "~/.claude/ccline/ccline",
    "padding": 0
  }
}
Windows:
{
  "statusLine": {
    "type": "command",
    "command": "~/.claude/ccline/ccline",
    "padding": 0
  }
}
后备方案(npm 安装):
{
  "statusLine": {
    "type": "command",
    "command": "ccline",
    "padding": 0
  }
}
更新
npm update -g @cometix/ccline使用
配置管理
# 初始化配置文件
ccline --init

# 检查配置有效性
ccline --check

# 打印当前配置
ccline --print

# 进入 TUI 配置模式
ccline --config
主题覆盖
# 临时使用指定主题(覆盖配置文件设置)
ccline --theme cometix
ccline --theme minimal
ccline --theme gruvbox
ccline --theme nord
ccline --theme powerline-dark

# 或使用 ~/.claude/ccline/themes/ 目录下的自定义主题
ccline --theme my-custom-theme
Claude Code 增强
# 禁用上下文警告并启用详细模式
ccline --patch /path/to/claude-code/cli.js

# 常见安装路径示例
ccline --patch ~/.local/share/fnm/node-versions/v24.4.1/installation/lib/node_modules/@anthropic-ai/claude-code/cli.js